Nesting objects – overview
This Help article is part of the following workflow:Creating and processing jobs
→
→
→
After importing your object files into DentalCAM, you have to nest them in your blank.
Nesting includes, but is not limited to, the following activities:
-
Positioning objects in the blank
-
Checking and correcting cavities and drill holes
-
Setting bars
-
Adding sinter bars and drops as needed
Your goal is to use your blanks as efficiently as possible while at the same time achieve a high machining quality.
There are 2 nesting views:
- In the first nesting view, you can adjust and position objects.
- In the second nesting view, you can set bars for each object.
- Open the Nesting view for adjusting objects with the following icon in the main toolbar:

- Open the Nesting view for setting bars with the following icon in the main toolbar:

You can quickly switch between both nesting views by right-clicking onto the blank when viewing it from the top.
Watch the videos
YouTube video – When viewing this video, personal data is sent to YouTube, LLC, USA. Privacy statement
YouTube video – When viewing this video, personal data is sent to YouTube, LLC, USA. Privacy statement
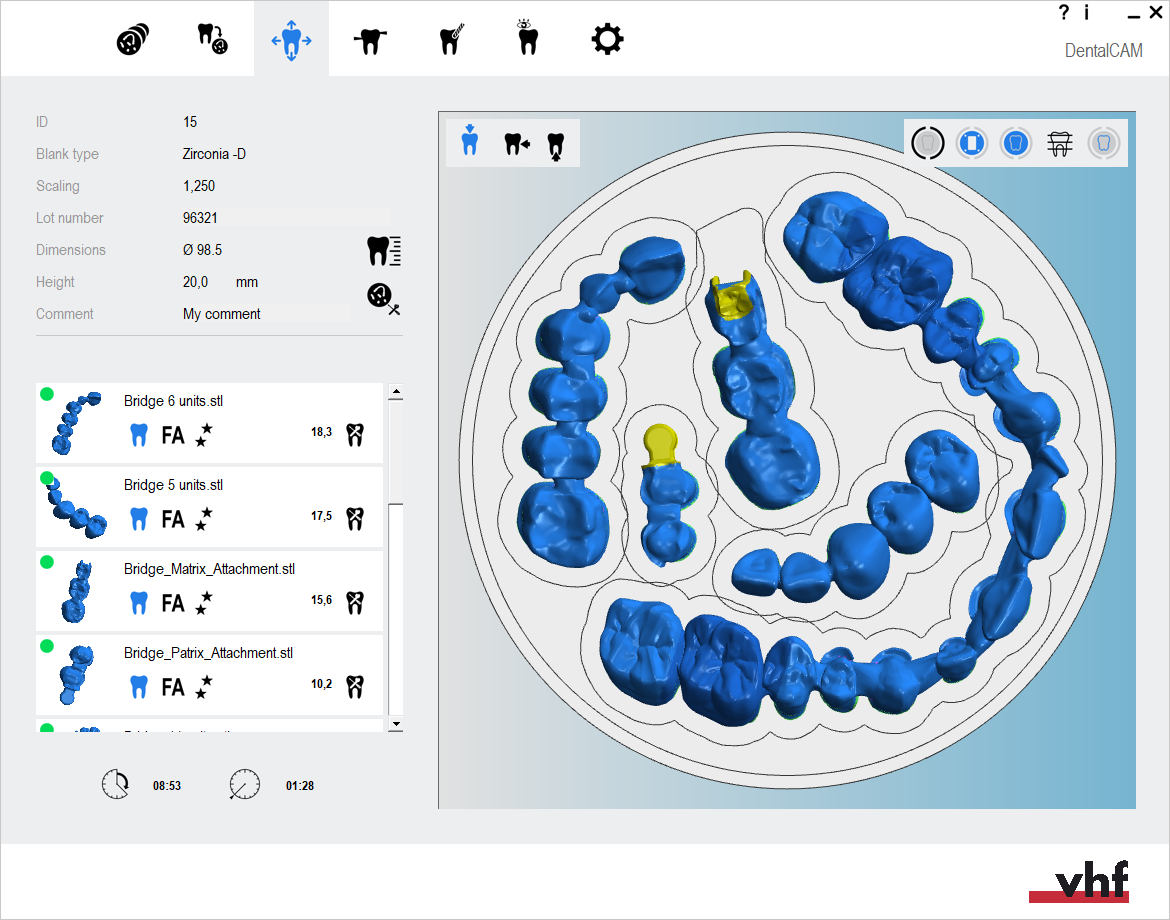
The nesting view for adjusting objects
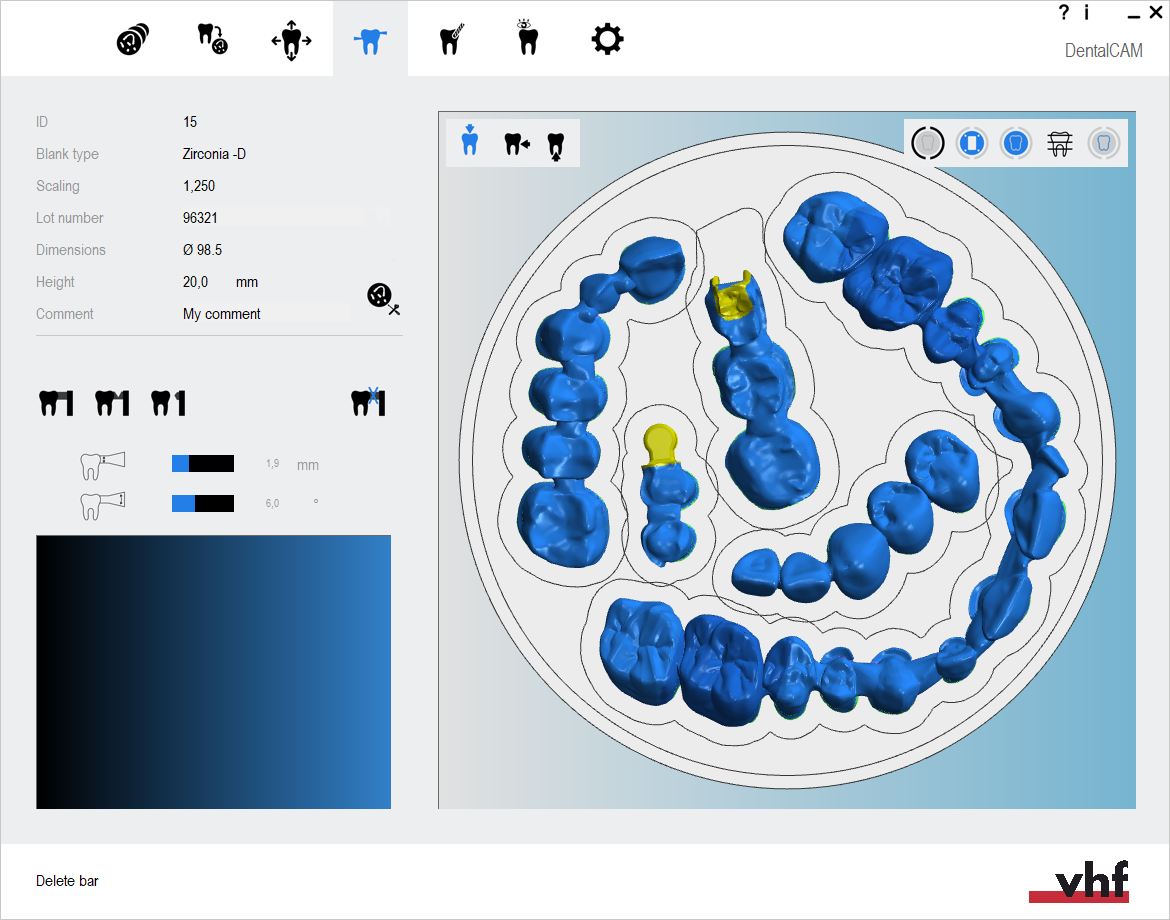
The nesting view for settings bars
How to nest objects
General nesting information
Working in the nesting view for adjusting objects
Changing the status of objects / deleting objects
Editing functions in the nesting view
Simple nesting workflow
The following workflow should be sufficient for many jobs:
- Position your objects horizontally and vertically in the top view.
- Rotate your objects about the Z-axis in the top view.
- Check if all cavities and drillings are correct.
- Specify the drilling range for objects with unrecognized drillings.
- Mark the cavities for objects with unrecognized cavities.
- Set bars for all objects.
Complete nesting workflow
The following workflow covers all aspects of nesting. Note that even when dealing with complex jobs, you won't need to perform every step listed below.
- Delete any incorrect machined areas.
- Change the status of objects and delete non-required objects.
- Position your objects horizontally and vertically in the top view.
- Rotate your objects about the Z-axis in the top view.
- Adjust the height position of your objects and/or rotate them about the X/Y-axis (required for multilayered blanks).
- Check if all cavities and drillings are correct.
- Specify the drilling range for objects with unrecognized drillings.
- Mark the cavities for objects with unrecognized cavities.
- Create a sinter bar for objects that require a sinter bar.
- Set drops for objects that require drops.
- Mark the attachment for objects with an attachment.
- Activate anterior tooth editing for the desired object)
- Edit or delete labels milled on objects.
- Set bars for all objects.