Setting bars
This procedure belongs to step 6 of the simple nesting workflow.
This procedure belongs to steps of the simple nesting workflow.
Setting bars is the final editing step that you perform for an object.
After you have set bars for an object, editing the object is restricted to moving it in the X and Y directions. For other changes, delete all bars attached to the object.
- Open the Nesting view for setting bars with the following icon in the main toolbar:

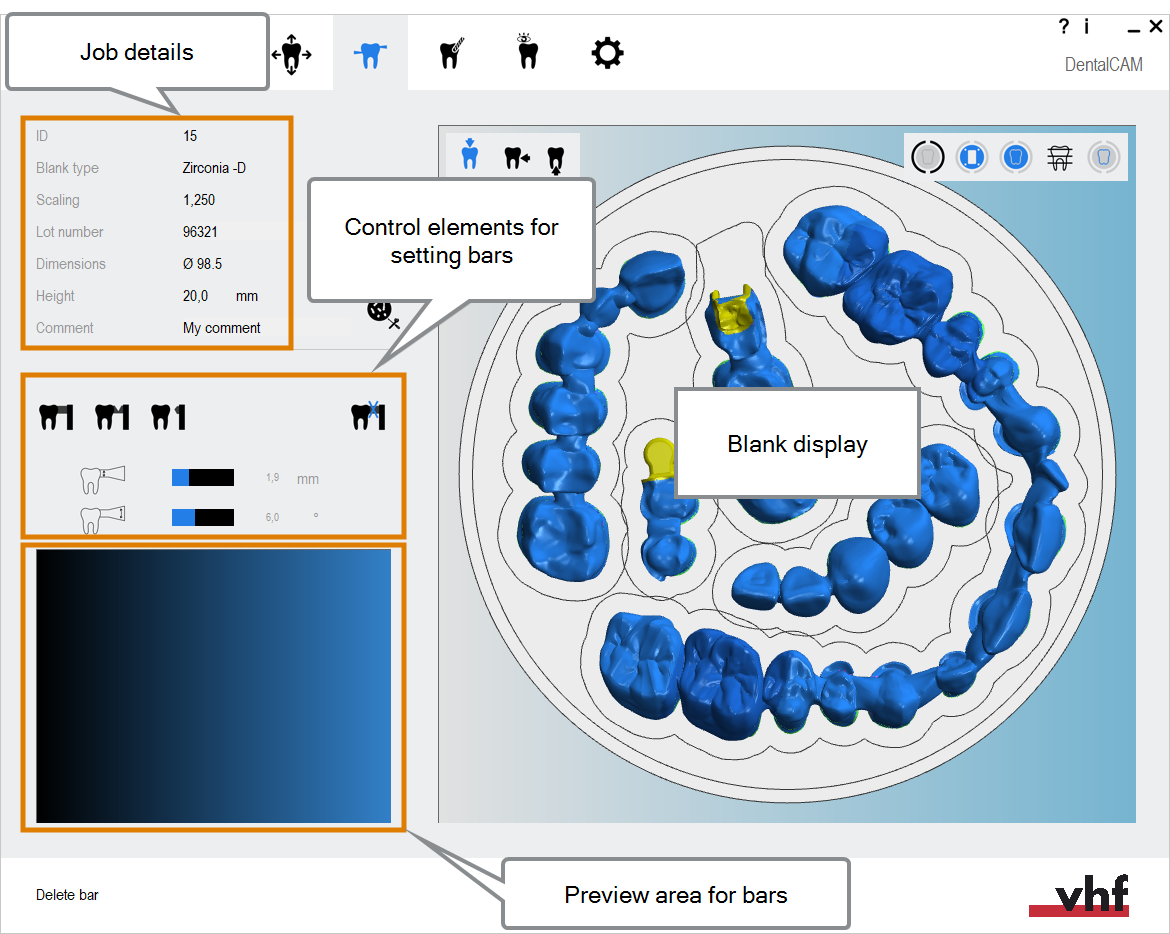
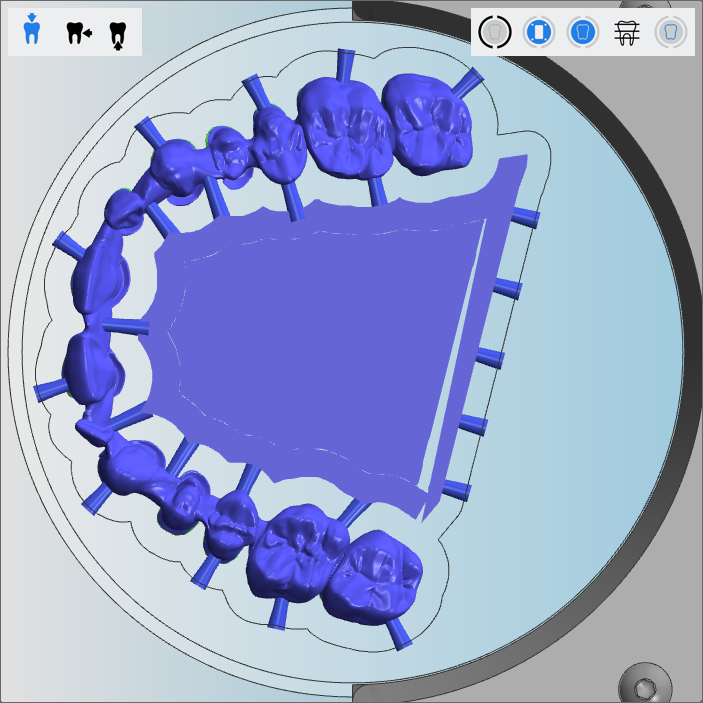
Elements in the nesting view for settings bars
Watch the video
YouTube video – When viewing this video, personal data is sent to YouTube, LLC, USA. Privacy statement
Poor holding force of bars due to incorrect placement
If bars are placed in unsuitable locations, the holding force of the bars may be too low.
- When setting bars, carefully check the surface of the objects in the preview area.
- Position bars only in suitable places according to the important information on positioning bars.
Types of bars
You can select among the following type of bars in DentalCAM:
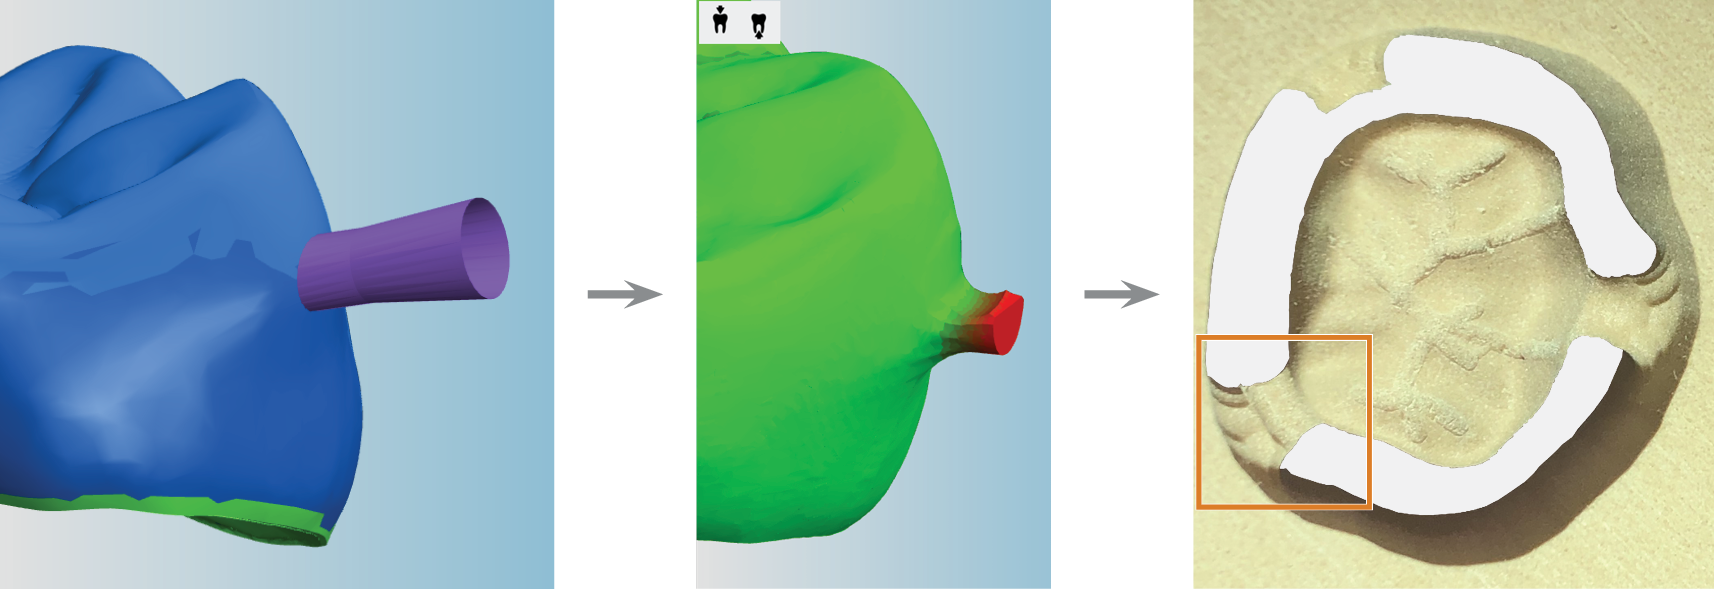
Intact bars
They are displayed in blue in the nesting view.
These bars will remain unchanged at the end of machining. Use them if you need a high level of stability, e. g. when working with softer materials.
Each object requires at least 1 intact bar to keep it from falling after machining.
Rule: The heavier the object/material, the more intact bars you must set.

Left to right: An intact bar in the nesting view, in the residual material display and on the machined object (marked orange)
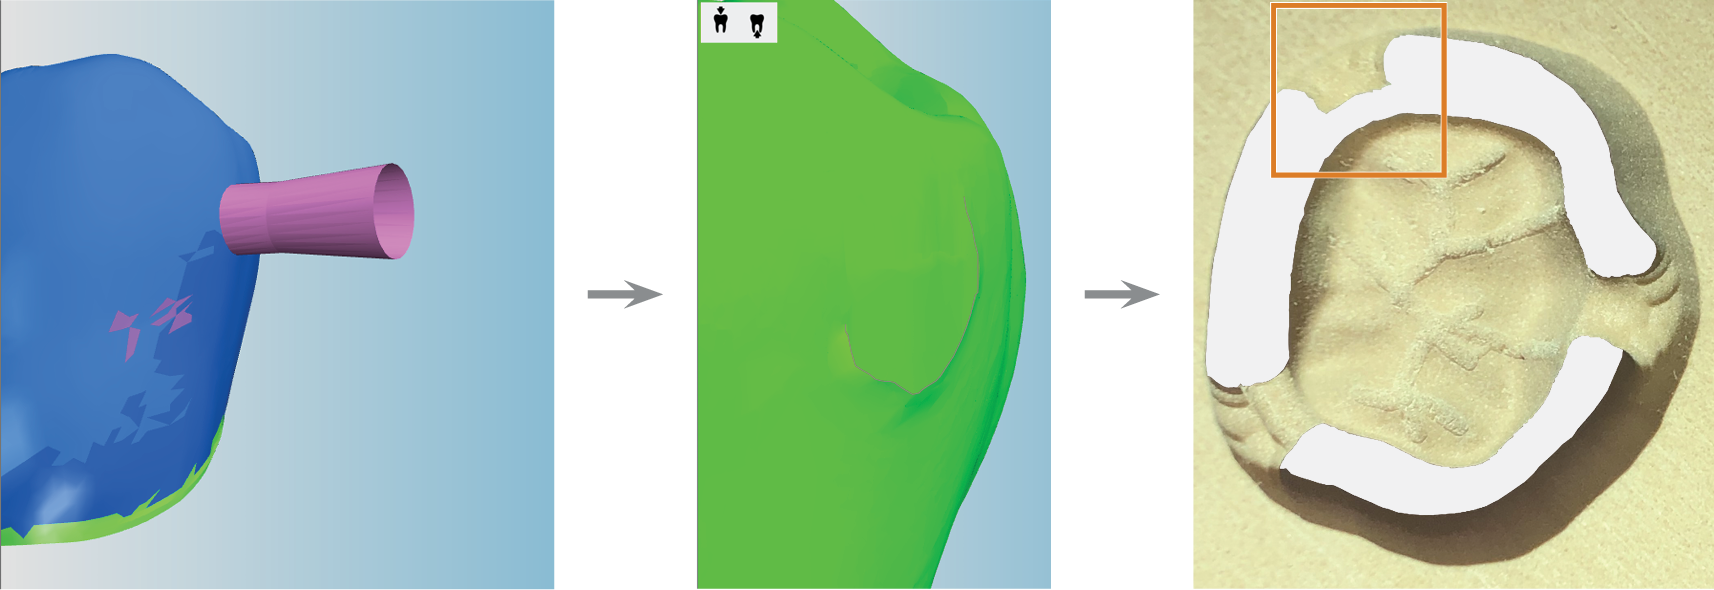
Reduced bars
They are displayed in purple in the nesting view.
Bars are reduced to make it easier to detach objects from the blank at predetermined breaking points.
In addition, less manual work will be needed after machining.
Via the Remaining area of reduced bars value bar in the machining parameters, you can specify the remaining area of reduced bars as a percentage of their original size.
Remaining area of reduced bars
Rule: If you reduce the bars too much or use too many reduced bars, objects may drop down to the bottom of the working chamber during machining and be damaged.
Left to right: A reduced bar in the nesting view, in the residual material display and on the machined object (marked orange)
Bars to be removed
They are displayed in pink in the nesting view.
These bars will be completely removed at the end of machining.
Rule: The fewer bars remain after machining, the easier it is to separate the object from the blank at the expense of stability.
In addition, less manual work will be needed after machining.
Left to right: A removed bar in the nesting view, in the residual material display and on the machined object (marked orange)
Parameters of bars
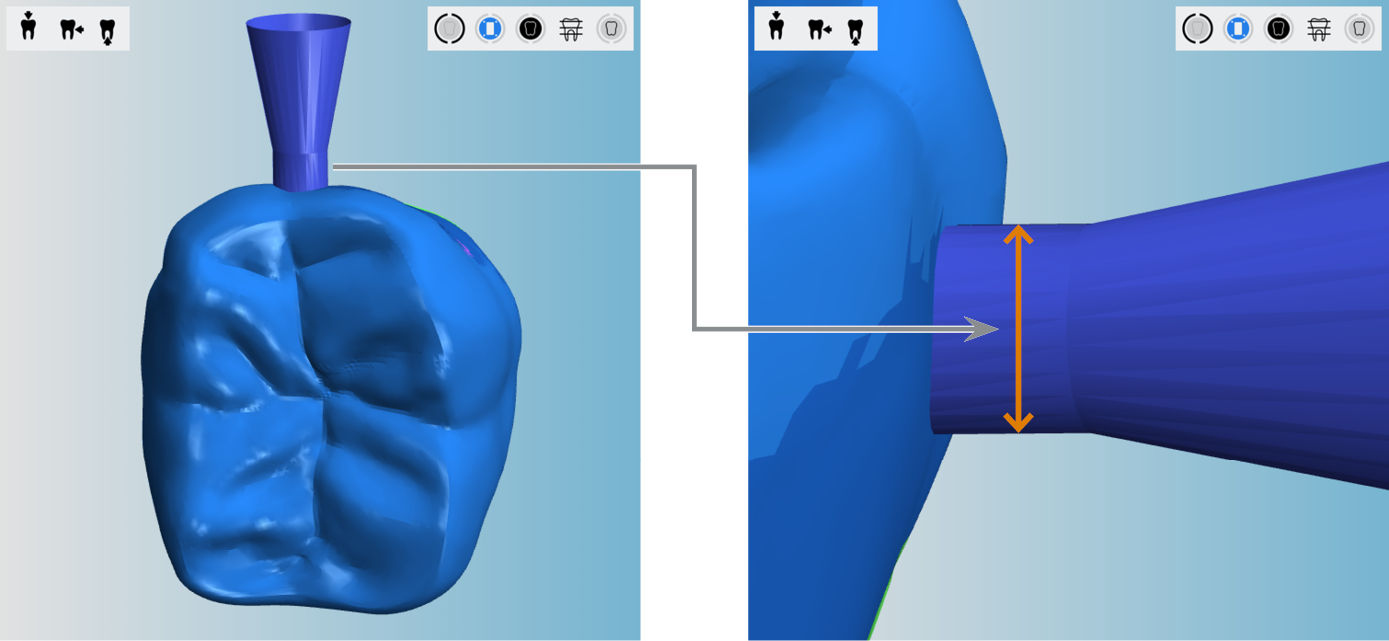
Diameter of the node in mm
The node is the point where the bar touches the object.
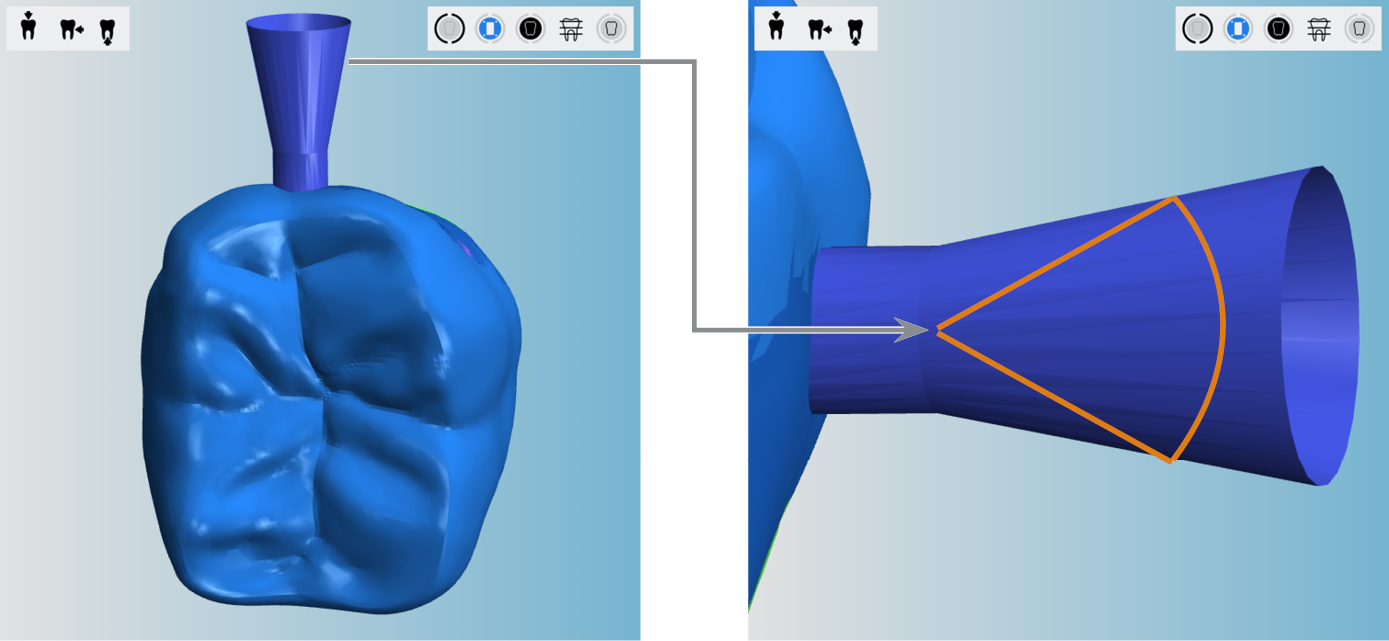
Degree of the opening angle
The opening angle specifies by how much the diameter of the bar increases in the direction of its end point.
Add bars
Every object has an empty workspace around it and therefore you need to set bars to hold the object in place. DentalCAM will not calculate jobs that contain objects without bars.

DentalCAM does not check if you have set enough bars or if you have positioned them correctly for proper machining. Therefore, carefully read the following instructions and also take into account the important information on how to properly set bars.
Control elements for setting bars
- Set intact bar
- Set reduced bar
- Set bar to be removed
- Delete bar
- Set diameter of node
- Set opening angle
The procedure
-
Select the type of bar that you want to create by selecting one of the following icons:
-
(Optional) Adjust the diameter of the node via the value bar marked with the following icon:
 .
.This setting only affects the next bar you set. To the right of the value bar you will find the current value in mm.
-
(Optional) Adjust the opening angle via the value bar marked with the following icon:
 .
.This setting only affects the next bar you set. To the right of the value bar you will find the current value in mm.
-
Select the location in the workspace where you want to place the bar.
- The bar automatically snaps to the outer surface of the object. DentalCAM displays the bar in the preview area in the left column.
-
To move the bar horizontally, do the following:
-
Select and hold the bar in the blank display.
-
Drag the bar in the appropriate direction using the mouse or touch gesture.
-
-
To move the bar vertically, do the following:
-
Select and hold the bar in the blank display.
-
Turn the mouse wheel.
Alternative for devices with touchscreen:
-
Select and hold the bar in the preview area.
-
Drag the bar up or down via touch gesture.
-
-
When you are satisfied with the position, release the mouse button. If you need to correct the position of a bar, select and hold the bar and repeat the relevant step.
-
Add more bars until you have set enough bars for the object.
NOTICE!
Possible tool breakage and inadequate machining results from adjusting the preset bar parameters


Bar in the blank display and in the preview area
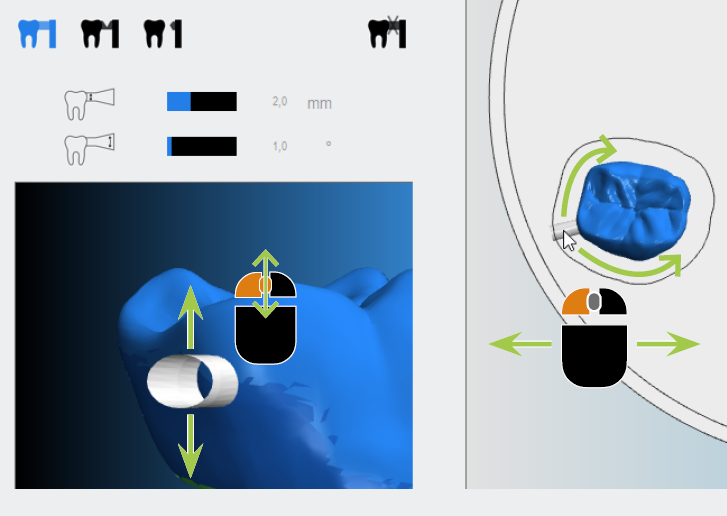
Blank display on the right: Moving a bar left and right; Preview area on the left: Moving a bar upwards and downwards
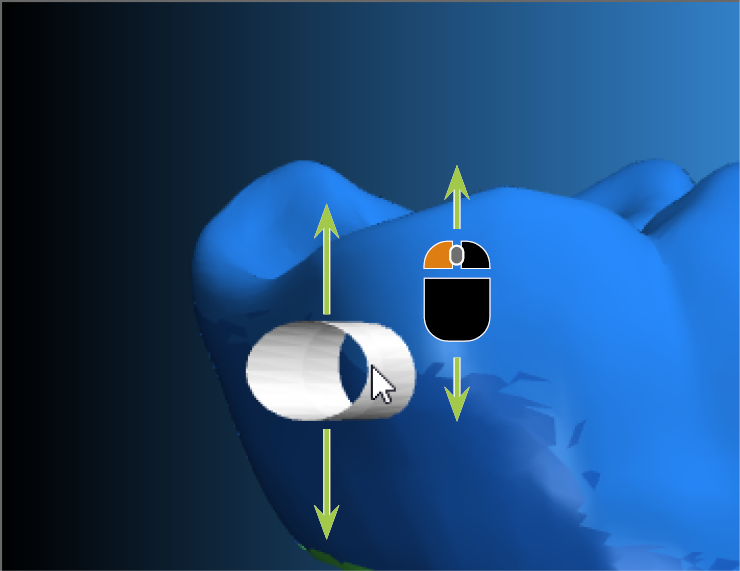
Alternative way to move a bar upwards and downwards in the preview area
Examples of objects with properly set bars:

A crown with 3 bars
A bridge with a sinter bar and 24 bars
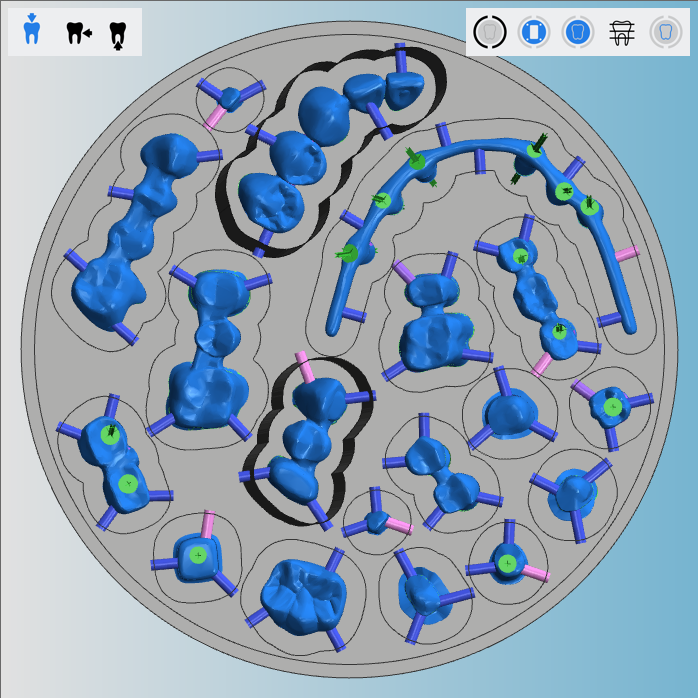
Multiple objects with bars
Deleting bars
- Select the following icon:

- The icon is highlighted.
- Select the bar to be deleted.

What's next?
Read:
Rules and recommendations for setting bars
If you are finished with nesting objects in the current blank:
If you are unsure whether you are finished nesting the current blank, see the simple and complete nesting workflow: