Commissioning
Watch the video

YouTube video – When viewing this video, personal data is sent to YouTube, LLC, USA. Privacy statement
The installation steps to operation are:
Step 1: Starting the machine
Short-circuit hazard when the machine is too cold
If the machine is transported from a cold environment into a warmer environment, a short circuit may occur caused by condensate.
- Before switching on the machine after transportation, ensure the following:
- The ambient air has the allowed temperature.
- The machine has the same temperature as the ambient air. This will take at least 48 hours.
- The machine is completely dry.
- Close the working chamber door.
-
Switch on the machine at the main power switch.
-
The working chamber lighting is on.

Step 2: Setting up a software connection to the machine
Installing and setting up CNC interface
-
Start the CAM computer
 The computer that is connected to your machine and which runs DentalCAM and DentalCNC..
-
Install the newest version of DentalCAM & DentalCNC that is released for the machine.
-
Select New as the installation type.
-
Select the correct machine model.
All information about the new installation: Installing DentalCAM & DentalCNC
-
-
The following happens:
-
During the installation, CNC interface will be installed. CNC interface establishes the connection between the machine and DentalCNC.
-
The CNC interface icon is displayed in the task bar info area on the right side of your Windows task bar. CNC interface will start in the background every time Windows is started.

-
Select the CNC interface icon in the task bar info area:

If the icon is not displayed in the position shown above, open the grouped icons with the up arrow icon (highlighted in orange).

-
The CNC interface window displays.

-
If you want to change the language, do the following:
-
Select the following icon on the right side of the window’s title bar:

-
Select the desired entry from the topmost drop-down list.
-
Save your entry with the following icon:

-
-
Create a new connection using the following icon:

-
The connection configuration view appears.

-
In the Description input field, enter a description that identifies the connection.
-
Check the Connect automatically option.
-
Select the stored COM port from the Port name drop-down list.
Example: COM105
-
Select the machine to be connected from the Machine drop-down list.
The entries are structured as follows:
Example: FOX-I E4ID300000000 (10.0.21.33)
-
E4 is the machine model
-
300000000 is the serial number
-
10.0.21.33 is the IP address

A fully configured connection with a unique description (serial number by way of example)
-
-
If the machine is not displayed, check the following:
-
Is the machine on?
-
If you are using a wired connection: Have you connected all Ethernet cables to the machine and the CAM computer
The computer that is connected to your machine and which runs DentalCAM and DentalCNC.? -
If you are using a WiFi connection: Is the signal sufficient? Recommendation: Try changing to a wired connection.
-
Is a firewall
Security software which monitors the network data to block harmful data. blocking the connection between the machine and the CAM computer The computer that is connected to your machine and which runs DentalCAM and DentalCNC.?
-
-
Save your entry with the following icon:
-
The connection you have set up is shown in the connection overview. The green dot indicates a successful connection.

A successful connection
If the connection is lost, the display changes to red. CNC interface tries to reconnect regularly.
A connection interruption can have the following causes:
-
The network operates unreliably.
-
Another CAM computer
The computer that is connected to your machine and which runs DentalCAM and DentalCNC. uses the machine.
-
-
If CNC interface indicates that there is an update, select the following icon:


-
CNC interface updates your machine.
-
Minimize the CNC interface window with the following icon:

-
Start DentalCNC.
-
Open the DentalCNC Application settings with the following icon in the main icon bar:

-
Open the General settings with the following icon in the local icon bar:

-
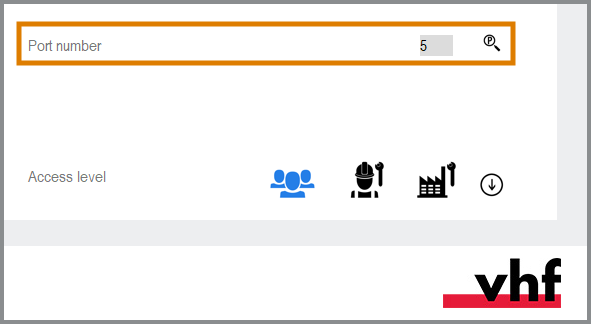
Select the following icon next to the Port number input field:

-
If DentalCNC is able to determine the port number, the number displays in the Port number input field. The machine references.
-
If the working chamber door was open during the previous step, close it. If the machine does not reference as a result, quit DentalCNC and restart the application.


Checking the connection and changing the connection settings
-
Open the task bar info area by clicking the up arrow (highlighted in orange) on the right side of your Windows task bar.
-
Select the CNC interface icon:
-
The window displays.
-
Move the mouse pointer over the entry in the overview and select the following icon:

Example: Red dot on unsuccessful connection
Step 3: Warming up the spindle
Step 4: (Optional) Set up chairside workflow
If you use the machine in the chairside area, you can adapt the manufacturing software![]() Term for the software package consisting of DentalCAM and DentalCNC. to this area:
Term for the software package consisting of DentalCAM and DentalCNC. to this area:
3Shape Produce workflow
3Shape Produce enables standardized data exchange between TRIOS Design Studio and DentalCAM.
Setting up and using 3Shape Produce workflow
CAD/CAM integration
If you use CAD/CAM integration, you will design and nest objects completely in the CAD application. When exporting, DentalCAM automatically calculates the machining strategy in the background and sends it to DentalCNC.
On Z4 machines, the touchscreen immediately displays the job for further processing.
What's next?
If you want to create a job in DentalCAM:
If you want to mount blanks: