Basic workflow
If you break down the workflow of DentalCAM and DentalCNC, you will discover that it can be quite simple. It doesn’t matter if you are new to computer aided manufacturing or a veteran, all required steps in the manufacturing software![]() Term for the software package consisting of DentalCAM and DentalCNC. should become clear to you very quickly.
Term for the software package consisting of DentalCAM and DentalCNC. should become clear to you very quickly.
Basic steps
Let’s take a look at the basic steps that you need to follow for successfully machining of high quality dental objects with DentalCAM and DentalCNC.
-
Create your job A job contains all the data required to machine a blank: 3D models, blank parameters, machining strategies and more.
-
Import your object data You create the 3D data for the object with an external CAD application. Next, you import this data into DentalCAM and set the necessary machining parameters.
-
Nest your objects After importing your object files into DentalCAM, you have to nest them in your blank.
Nesting includes, but is not limited to, the following activities:
-
Positioning objects in the blank
-
Checking and correcting cavities and drill holes
-
Setting bars
-
Adding sinter bars and drops as needed
Your goal is to use your blanks as efficiently as possible while at the same time achieve a high machining quality.
-
-
Have your job calculated Once your job is completely designed, the optimal machining strategy for it must be calculated before the CNC machine can get to work.
-
Execute your job As soon as a job is calculated, it is added to the job list in DentalCNC or the touchscreen of Z4 . You only have to prepare your machine and start machining. Thanks to the DirectMill feature, you can already start machining the job while it is still being calculated.
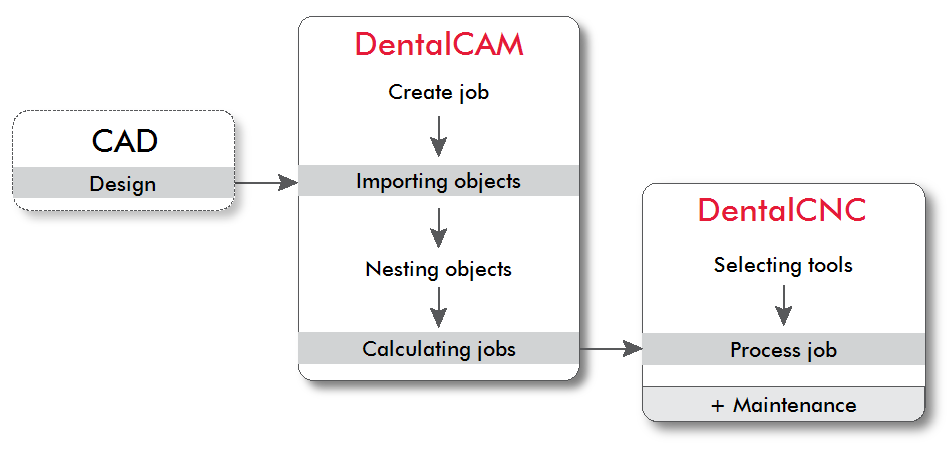
Basic workflow diagram; Note: The CAD application is not supplied with your machine