Installing and setting up dentalcam 9 and dentalcnc 9
By following the correct order when installing and setting up dentalcam and dentalcnc, you save time and ensure that everything works properly.
If you use dentalcnc without dentalcam, skip the corresponding steps.
Step 1: Check and configure your computers
For each dentalcnc and dentalcam computer, you must perform the following steps:
-
Check the system requirements: System requirements and supported machines
-
Install all Windows updates.
-
Update all hardware drivers.
-
Install the latest version of the Microsoft VC Redistributable for your Windows version.
Permanent link to the latest supported x64 version on the Microsoft server
-
When using a portable computer, ensure a constant electrical supply.
Step 2: Install dentalcam
-
Download the dentalcam setup program
 A separate program called "Setup.exe" which installs the applications on your hard drive.: dentalcam-9-Download
 -
Do not start the program yet.
Step 3: Install dentalcnc
-
Download the dentalcnc setup package: dentalcnc-9-Download
-
When doing this, install the following components:
Component
Description
Necessary?
FTDI
Drivers for machine connectivity
YesFor all machine models
SX Virtual Link
Network connection program
RestrictedFor K5+, N4+, R5
-
Start dentalcnc
Step 4: Enable power-saving plan
dentalcam & dentalcnc set up their own power-saving plan during installation. This is a balance between power consumption and computing power and has been optimized for use with dentalcam & dentalcnc.
-
The power-saving plan is an alternative to the power-intensive High Performance power-saving plan.
-
Recommendation: Do not use any other power-saving plans, as these may interrupt the job calculation or manufacturing process.
-
In the Windows Start menu, open: Control Panel > Power Options.
-
Make sure that the Optimized (recommended when milling) or Maximum Performance power-saving plan is activated.
If necessary, show all power-saving plans via Show more power-saving plans.
Step 5: Set up the machines
-
Set up the machine connection: Setting up dentalcnc machines.
-
Start dentalcam.
-
Add your machines to dentalcam. For instructions, see Activate machine models.
Step 6: Set up dentalcam
-
Familiarize yourself with the main areas of the user interface: The dentalcam user interface.
-
(Optional) Change the default exchange folder for dentalcnc-jobs. Data is transferred to dentalcnc via the exchange folder.
If you run dentalcam & dentalcnc on the same computer, you can skip this step. It is necessary to use a folder other than the default one, especially when using multiple computers on a network.
-
Open the dentalcam settings with the following icon in thesystem menu:

-
Select the Program settings tab.
-
In the Folder section, enter the desired destination folder in the Exchange folder for dentalcnc jobs input field.
Alternative: Click the
 icon in the input field and select the destination folder via the file browser.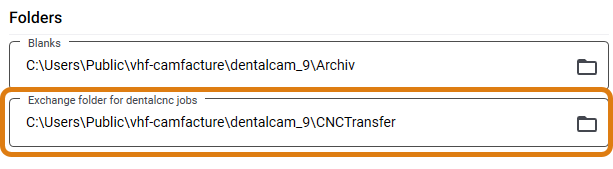
-
-
(Optional) Import your dentalcam 8 archive. For instructions, see Import dentalcam 8 data.
-
Activate the material settings, including optional tools. For more information, see Material settings.
Step 7: Set up dentalcnc
-
Familiarize yourself with the main areas of the user interface: The dentalcnc user interface.
-
Open the dentalcnc settings with the following icon in thesystem menu:
-
Specify the exchange folder for dentalcam data in the Jobs section:
-
To apply the folder from the dentalcam settings, select the following icon next to the Exchange folder for dentalcam jobs input field:

To do this, dentalcam must be installed on the same computer.
-
Alternative: Enter the desired folder into the input field.
-
-
Enter your tool stock. For instructions, see Adding manufacturing tools

What's next?
Learn about the main workflow of dentalcam
Start creating your first blank by importing an object:


