Adding and deleting sinter bars for bridges
If you want to use a sinter bar to prevent bridges from deforming during sintering, add it with the Adding/Editing sinter bar editing function. dentalcam supports multiple types of sinter bars.
Nesting rules for sinter bars
-
Ensure the correct volume The volume of the sinter bar should be roughly equal to the volume of the object.
When the volumes are the same, this allows faster heating and cooling during sintering.
-
Use connectors Sinter bars must be connected to the object with connectors. Otherwise, they will fall into the working chamber.
-
To use the blank more economically, you can position 1 object on the inner surface of the sinter bar.
Types of sinter bars
dentalcam supports the following types of sinter bars:


Closed sinter bar with a supporting bar and milled inner body
Objects with this type of sinter bar typically rest on the supporting bar inside the sintering oven. You can also use drops. This is the most commonly used type of sinter bar.
With this type of bar, you can easily ensure the correct volume.

Closed sinter bar with supporting bar and filled inner body
This type of sinter bar saves manufacturing time by eliminating the need to mill the inner body.
With this type of sinter bar, it is more difficult to ensure the correct volume. To do this, you must set the height – and thus the volume – of the inner body when editing the sinter bar.
How to Create and Delete Sinter Bars
Requirement You are editing a blank in the Nesting view using appropriate objects.
-
Activate the top view with
 .
-
Select the desired object in the blank display.
-
Open the Add/edit sinter bar editing function with
 .
-
-
Use the Undo button to undo the last step.
-
You can delete the current sinter bar with
 any time and close the editing function.
-
-
Select the sinter bar type.
You can change the type later.
-
dentalcam creates a proposal for the sinter bar in the blank display. The suggested form depends on how well the program was able to analyze the object.
-
Pull the points at the ends of the sinter bar until it has the desired shape.
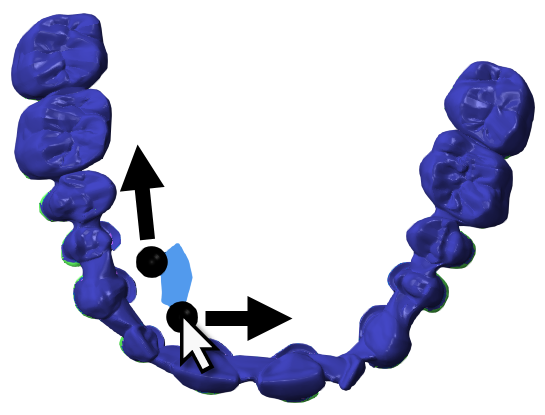
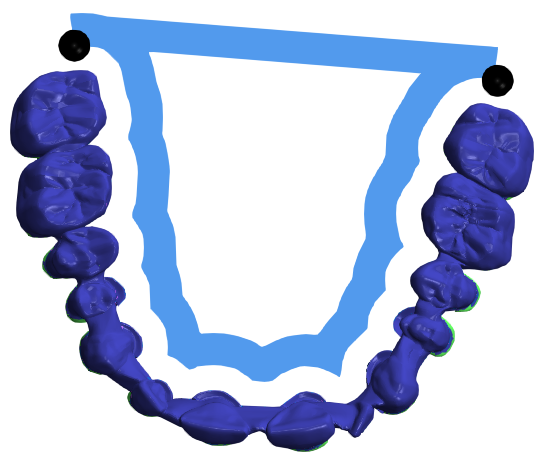
-
(Optional) Adjust the following values:
-
S: Width of the sinter bar with the supporting bar
-
H1: Height of the sinter bar without a supporting bar
-
H2: Height of the supporting bar
-
H3: Height of the filled inner body
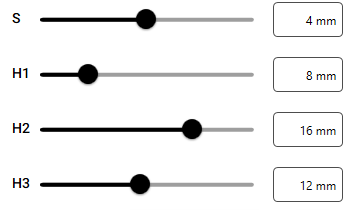
Control elements for sinter bars with default values
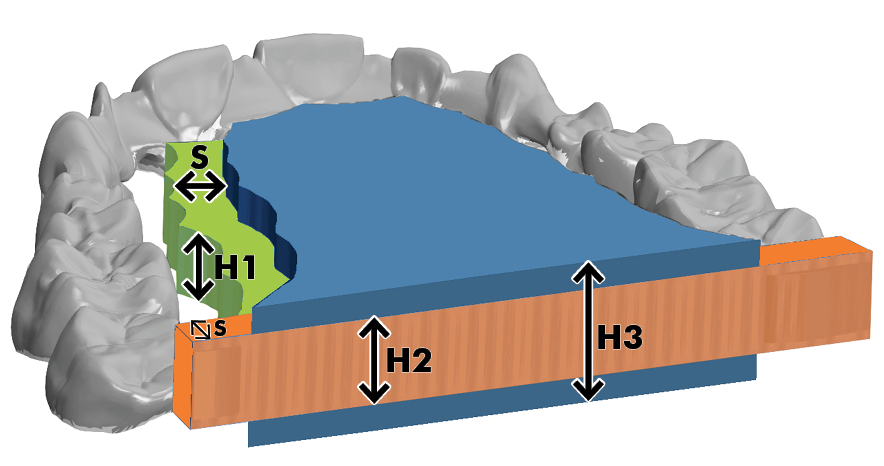
Blue
Inner body
Orange
Supporting bar
Green
Sinter bar
The dimensions shown for the sinter bar in the figure above and in the video below are for illustrative purposes only. They are not an example of good nesting practice.
-
-
Click the Save button to save.
Do not use
. -
dentalcam closes the editing function.


What's next?
If desired, add drops:
Connect the sinter bar with connectors:


