Cleaning or exchanging the coupling of the cooling liquid tank
Watch the video

YouTube video – When viewing this video, personal data is sent to YouTube, LLC, USA. Privacy statement
Cleaning the coupling of the cooling liquid tank
Damaging of the machine when improperly cleaning the cooling liquid coupling
Internal components of the cooling liquid coupling can get lost during cleaning, which impedes the proper functioning of the coupling. Unscrewing the fixing nut can alter the position of the coupling and cause leakage.
- Always open the cooling liquid coupling carefully and ensure that you do not lose any components during cleaning.
- Never unscrew the fixing nut during cleaning
-
Clean the cooling liquid tank and remove the cooling liquid filter.
Exchanging the cooling liquid and cleaning the cooling liquid tank
- Always open the cooling liquid coupling carefully and ensure that you do not lose any components during cleaning.
- Never unscrew the fixing nut during cleaning
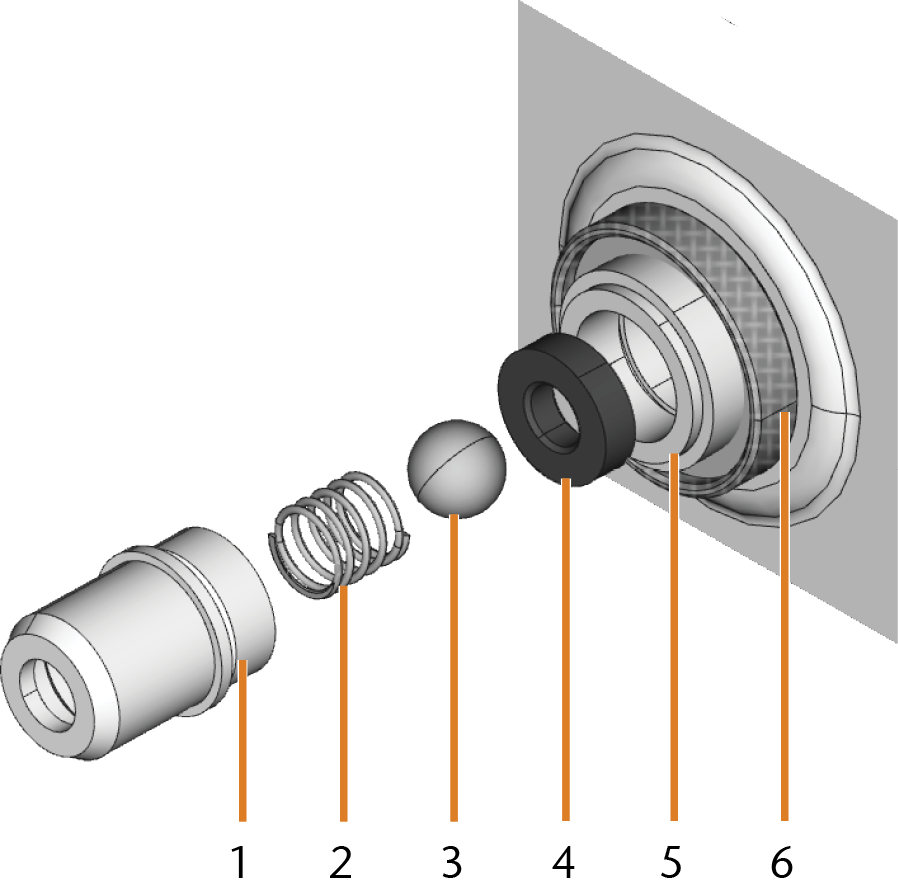
- Unscrew the cap [1] of the coupling by hand. Do not
- Remove the valve spring [2], ball [3] and valve seat [4] from the socket [5] and the cap [1] of the coupling.
- Cap of the coupling
- Valve spring
- Ball
- Valve seat
- Socket of the coupling
- Fixing nut (do not unscrew during cleaning)
- Rinse the disassembled components of the coupling under running water and dry them with a cloth.
- Place the valve seat in the socket of the coupling.
- Place the spring in the cap of the coupling.
- Position the ball in the valve seat and screw the cap onto the socket of the coupling.
-
Install the cooling liquid filter and refill the tank.
Damaging of the machine when improperly cleaning the cooling liquid coupling
Internal components of the cooling liquid coupling can get lost during cleaning, which impedes the proper functioning of the coupling. Unscrewing the fixing nut can alter the position of the coupling and cause leakage.
Exchanging the coupling of the cooling liquid tank
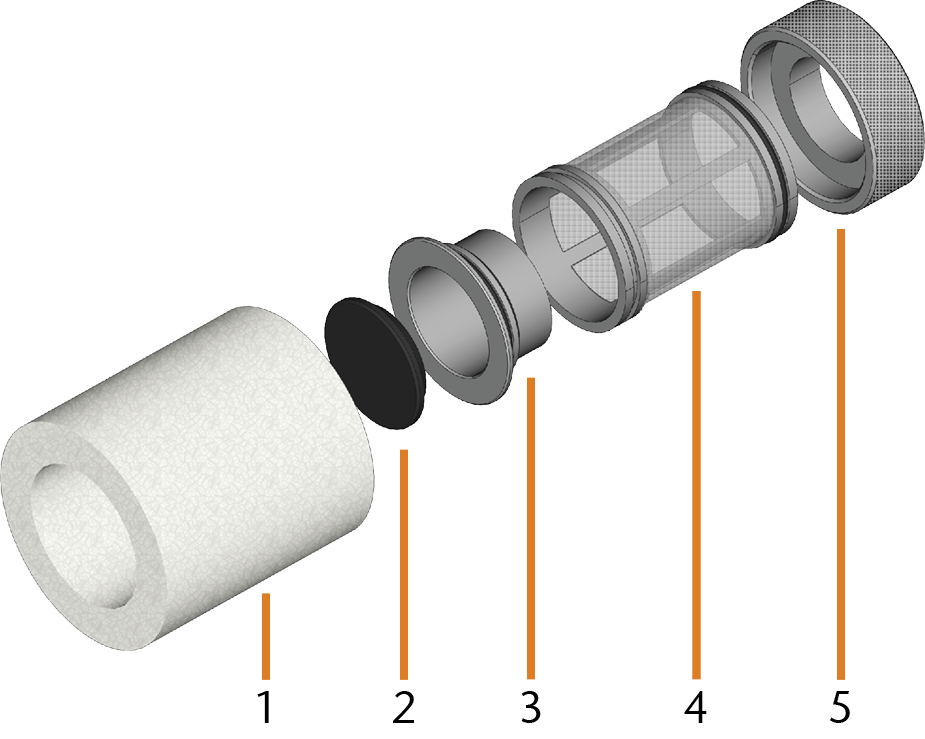
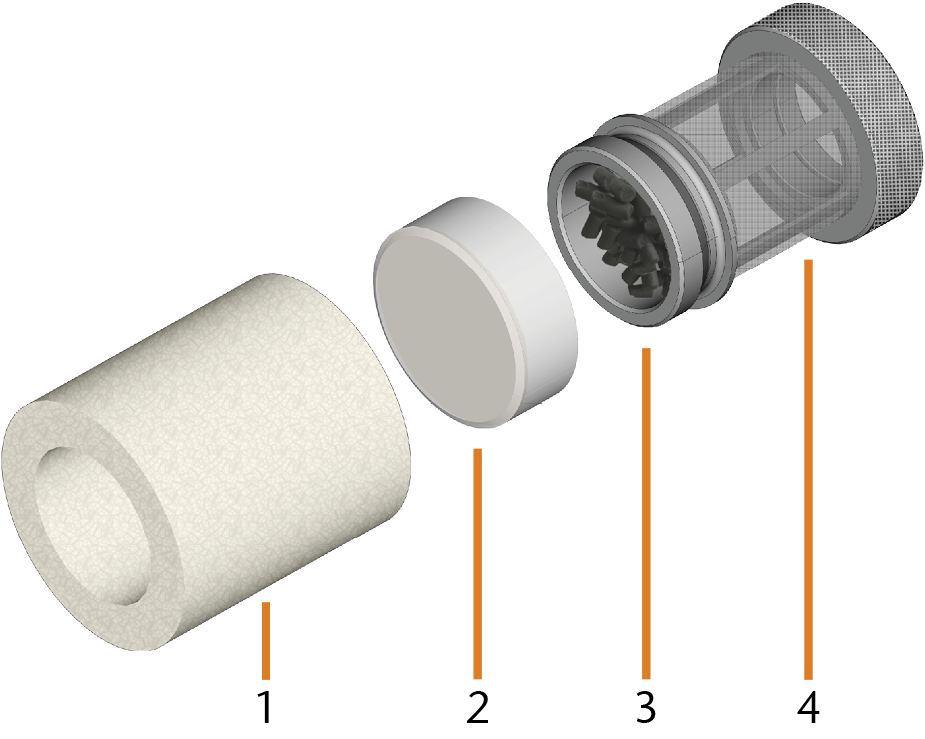
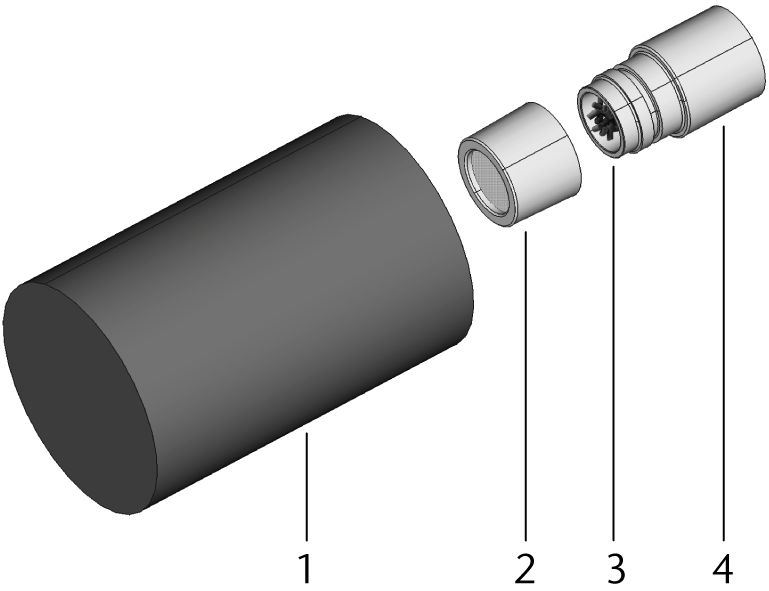
There are the following variants of the cooling liquid filter:
Variant A
- Fine filter
- Cap of the carbon filter
- Carbon filter
- Mesh filter
- Filter socket
Variant B
- Fine filter
- Cap of the carbon filter
- Carbon filter
- Mesh filter
Variant C
- Fine filter
- Cap of the carbon filter
- Carbon filter
- Filter housing
| Variant | Current | Filter fixation | Nut required? |
|---|---|---|---|
|
A |
No |
Plugged |
No |
|
B |
No |
Screwed |
Yes* |
|
C |
Yes |
Screwed |
Yes* |
**An additional nut fixates the coupling of the cooling liquid tank onto which the filter is screwed. The nut is supplied with the spare part.
-
Older versions are possible no longer be available as spare parts.
-
All variants are compatible with all cooling liquid tanks.
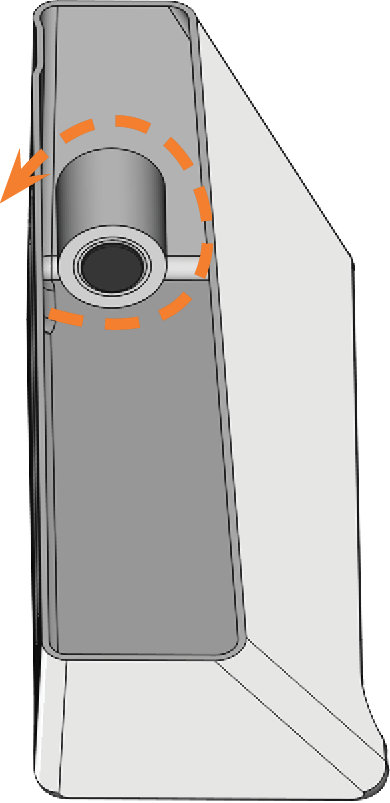
- Empty the cooling liquid tank.
- While holding the coupling of the cooling liquid tank from the outside with one hand, unscrew the filter of the cooling liquid tank with the other hand.
- Put the filter aside.
-
- Push the coupling out of the tank.
-
Thoroughly clean the cooling liquid tank. Especially clean the sealing surface around the opening for the coupling. Otherwise the cooling liquid tank may leak.
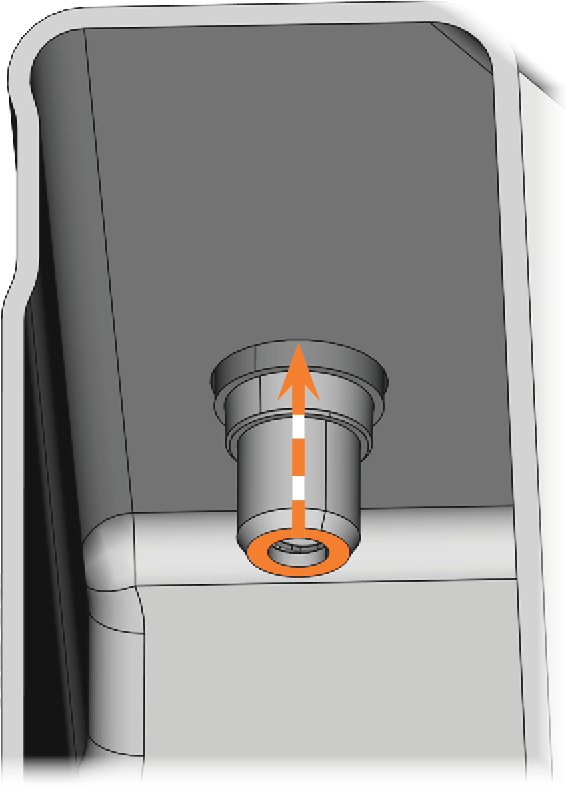
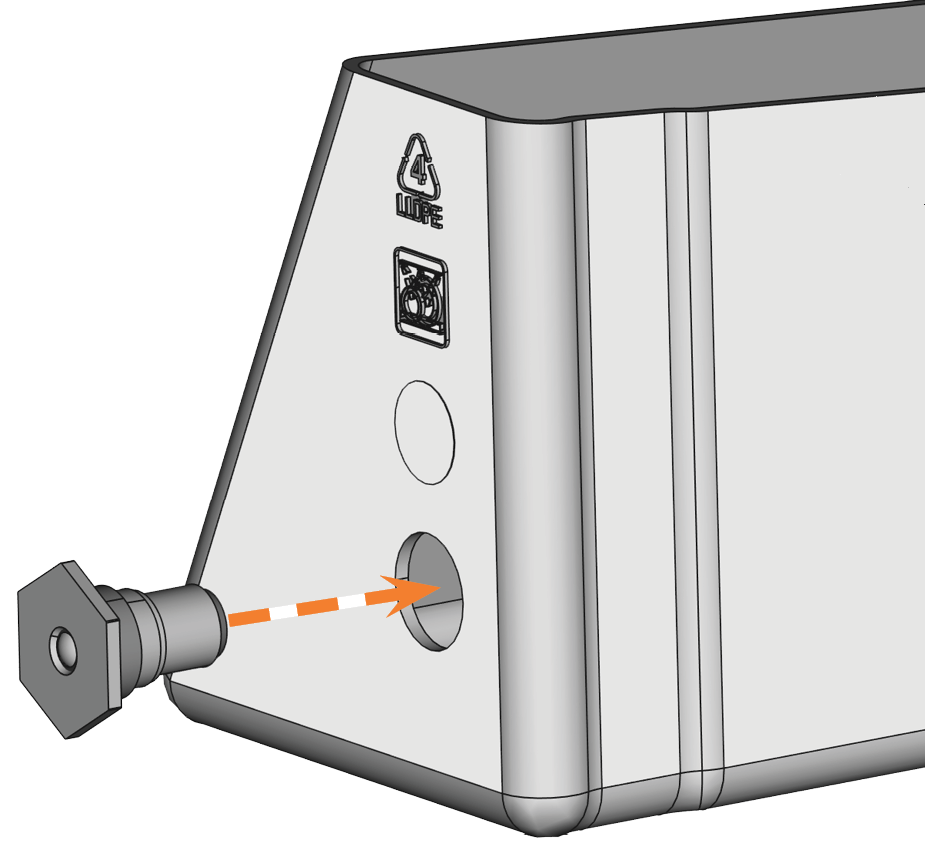
- Insert the spare coupling into the designated opening as shown in the following figure.
-
Filter version A: Screw down the filter onto the coupling by hand. Do not tighten the filter completely yet.
-
- Reinsert the cooling liquid tank until the tank is properly attached to the machine.
- Pull the cooling liquid tank out of the machine again.
- Filter version A: Fully tighten the filter.
-
- Fill new cooling liquid into the tank.
- Reinsert the cooling liquid tank until the tank is properly attached to the machine.
NOTICE! Damage to the coupling due to premature tightening of the filter