Applies to: Dental machines
Cleaning or exchanging the collet chuck of the spindle
The collet chuck is cleaned and exchanged in different steps:
|
Step |
Cleaning | Exchanging |
|---|---|---|
|
Yes |
Yes |
|
|
Yes |
No |
|
|
Yes |
Yes |
|
|
Yes |
Yes |
Damaging of the spindle when cleaning with compressed air
If you clean the collet chuck with compressed air, the spindle bearings can be damaged.
- Clean the collet chuck only with the appropriate service set.
Watch the video
YouTube video – When viewing this video, personal data is sent to YouTube, LLC, USA. Privacy statement
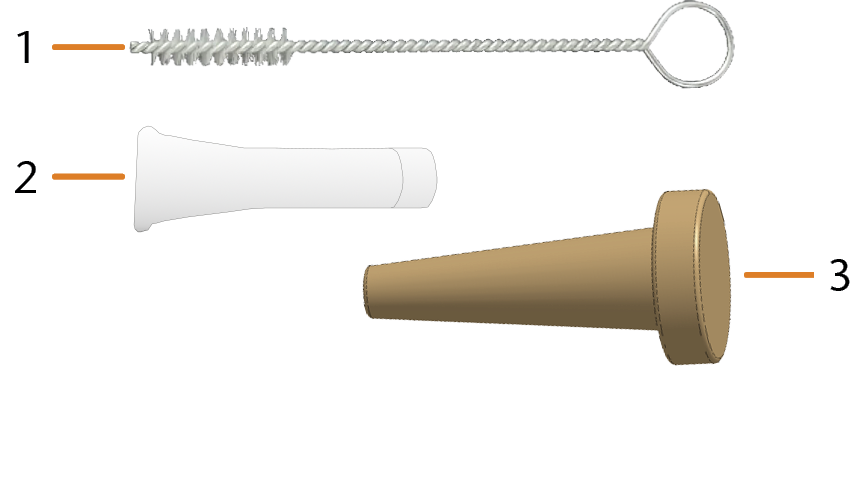
Current spindle service set
- Cleaning brush
- Tube of collet chuck grease
- Cleaning cone
Beside the current version of the spindle service set, there are 2 previous versions.
| First set | Second set | Current set |
|---|---|---|
|
Knurled nut without pin Measuring pin required |
Knurled nut with measuring pin |
without a knurled nut Collet wrench from the accessories required |
 First spindle service set
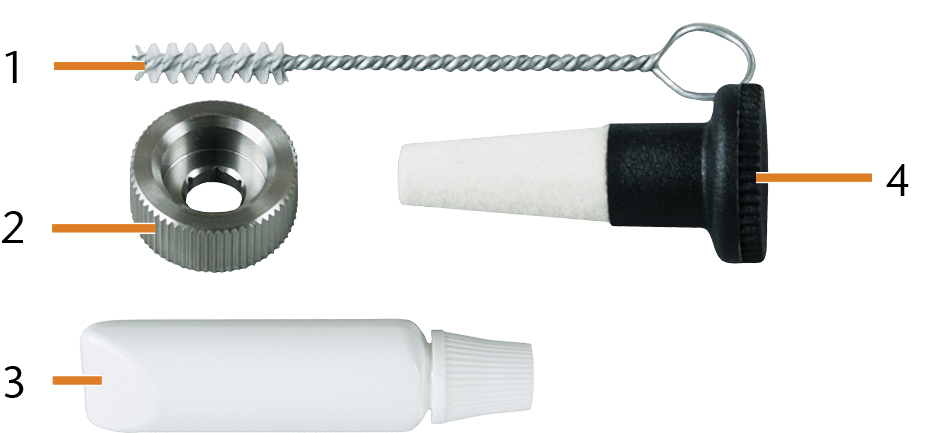
First spindle service set
- Cleaning brush
- Knurled nut
- Tube of collet chuck grease
- Cleaning cone
Clean the collet chuck as follows:
- Have the spindle service set readily.
- Close the working chamber door.
 Use the icon shown to move the axes to the tool change position.
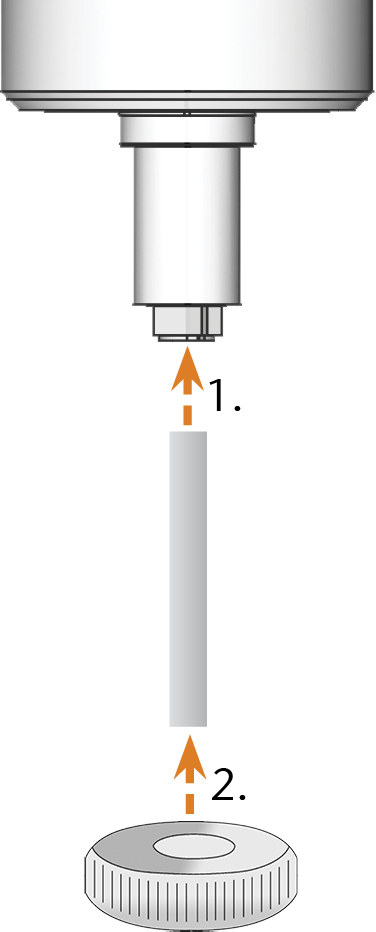
- Place the knurled nut onto the spindle with one hand. With the other hand, insert the measuring pin into the collet chuck and hold it in place.
- Loosen the collet chuck with the knurled nut. Unscrew the collet chuck by hand or with the knurled nut.
- Remove the measuring pin from the collet chuck. Then put it aside within reach, together with the knurled nut.
- Clean the inner cone of the spindle with the cleaning cone of the service set.
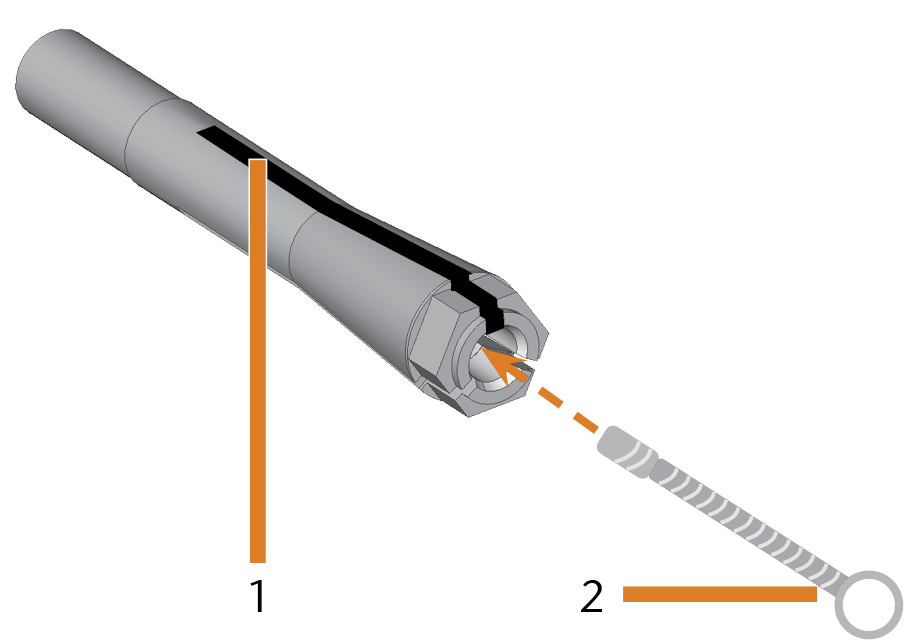
- Clean the collet chuck with the brush of the service set.
- Longitudinal slot
- Cleaning brush
- Before applying the grease, ensure that the collet chuck is perfectly clean.
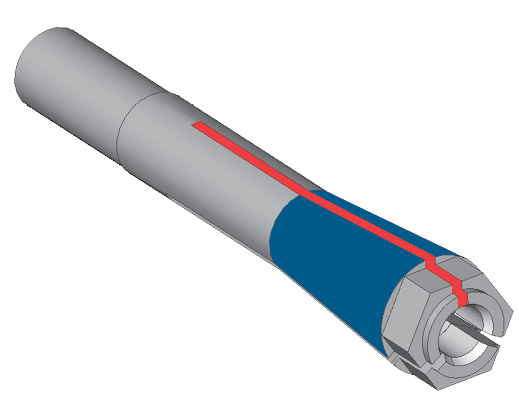
- Ensure that no grease gets into the longitudinal slots of the collet chuck.
- Only use a very small amount of grease, less than the size of a pinhead.
- Only use the provided grease of the service set.
- Put a small amount of the collet grease on your index finger and rub it with your thumb.
- Apply the smeared collet grease to the flanks of the collet chuck (marked blue). Make sure that no collet grease gets into the slots (marked red).
- Insert the measuring pin into the collet chuck with one hand and hold it in place. Screw the collet chuck with the knurled nut in your other hand tightly into the spindle.
- Remove the measuring pin from the collet chuck and store it together with the other components of the spindle service set.
- Clean the nozzle plate.

Damaging of the spindle when using the wrong grease or applying the grease incorrectly
If you use unsuitable grease or if grease gets into the longitudinal slots of the collet chuck, the machine may get damaged.
NOTICE! Rotational imperfections when the collet chuck is not tightened properly.
Second spindle service set
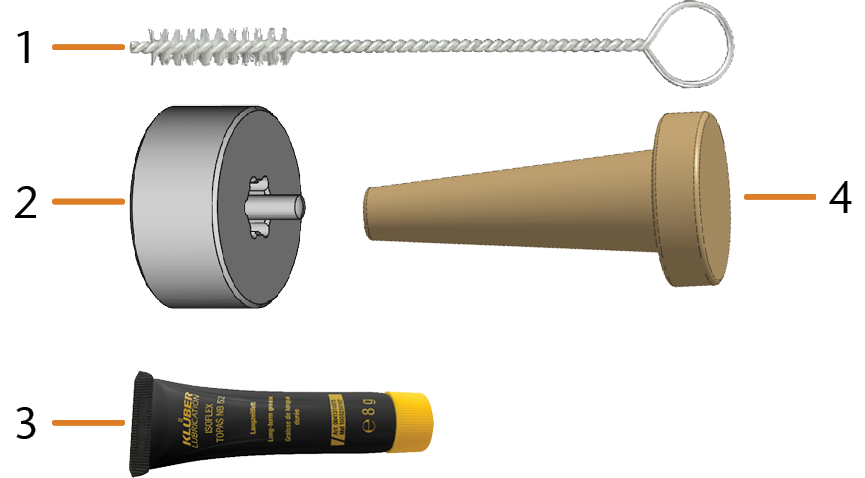
Second spindle service set
- Cleaning brush
- Knurled nut
- Tube of collet chuck grease
- Cleaning cone
Step 1: Removing the collet chuck
-
Have the spindle service set ready.
- Close the working chamber door.
-
Open the Maintenance section with the following icon in the main icon bar:

- Select the following icon for the entry Exchange spindle collet chuck:

-
The spindle moves into the position for collet chuck cleaning.
- Open the working chamber door.
-
CAUTION!Wear gloves.
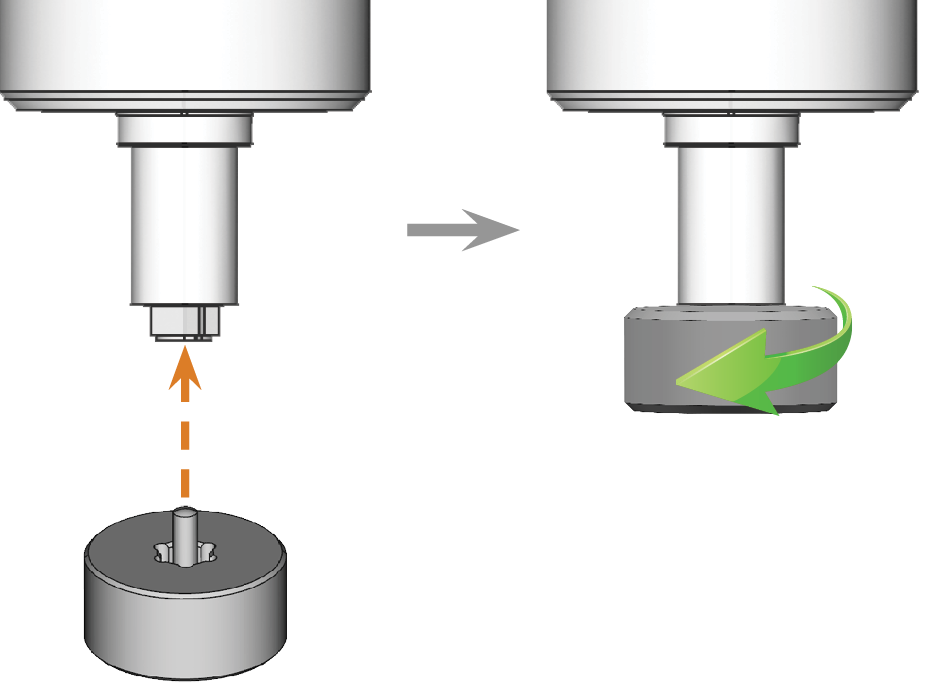
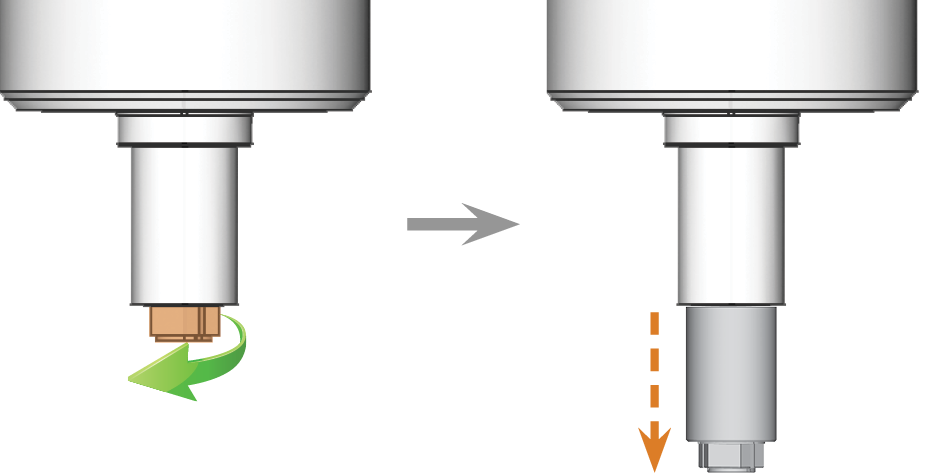
- Untighten the collet chuck with the knurled nut:
Insert the pin of the knurled nut into the collet chuck.
Make sure that the collet chuck is properly seated in the recess of the knurled nut.
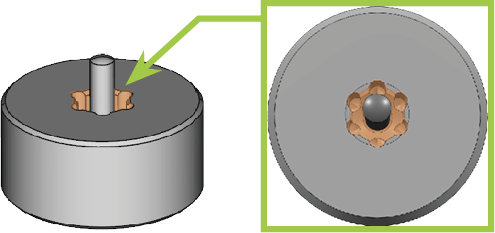
Twist the knurled nut counterclockwise.
-
Unscrew the collet chuck by hand and remove it.
- Put the knurled nut and the collet chuck aside within reach.
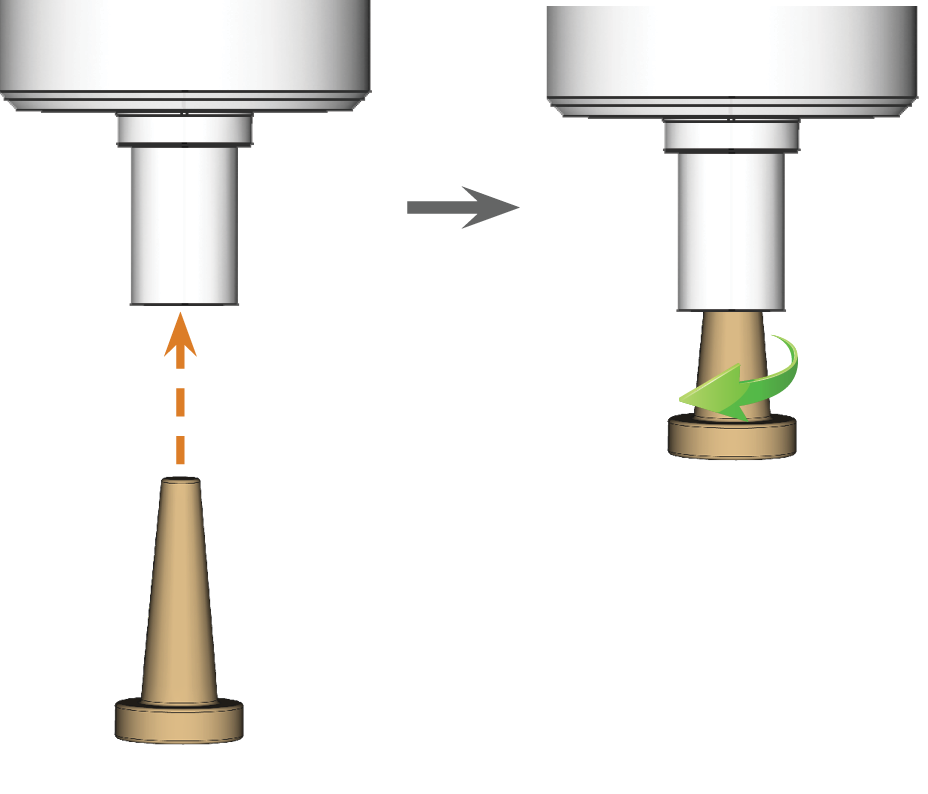
- Clean the inner cone of the spindle with the cleaning cone of the service set.
Step 2: Cleaning the collet chuck
-
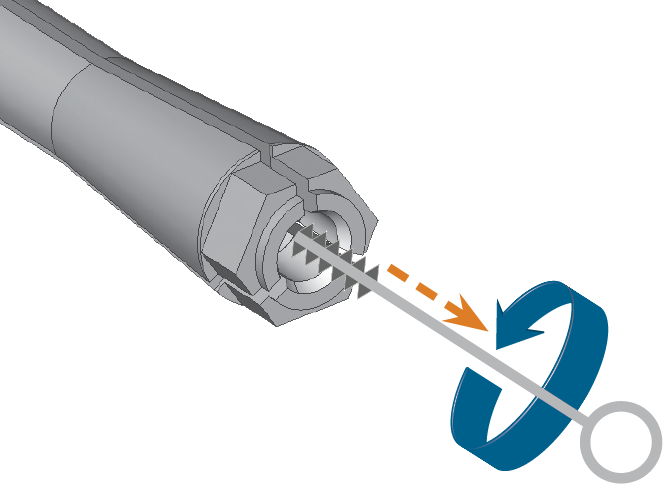
Clean the collet chuck with the brush of the service set.
-
Insert the brush into the collet chuck until the end of the brush aligns with the end of the collet chuck.
Do not push any further because otherwise dirt my get into the thread of the collet chuck.
-
Rapidly pull the brush out of the collet chuck and twist it at the same time.
-
Repeat the last 2 steps multiple times.

-
-
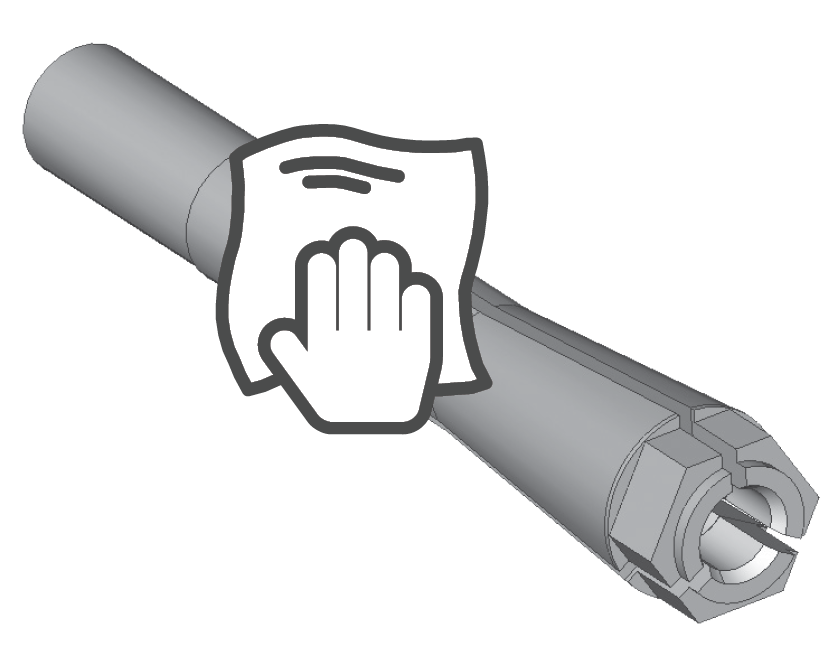
Thoroughly clean the complete outer surface of the collet chuck with a clean and dry cloth.
Step 3: Greasing the collet chuck
Damaging of the spindle when using the wrong grease or applying the grease incorrectly
If you use unsuitable grease or if grease gets into the longitudinal slots of the collet chuck, the machine may get damaged.
- Before applying the grease, ensure that the collet chuck is perfectly clean.
- Ensure that no grease gets into the longitudinal slots of the collet chuck.
- Only use a very small amount of grease, less than the size of a pinhead.
- Only use the provided grease of the service set.
- Put a small amount of the collet grease on the index finger and smear it with the thumb.
- Apply the smeared collet grease to the flanks of the collet chuck.
Step 4: Inserting the collet chuck
-
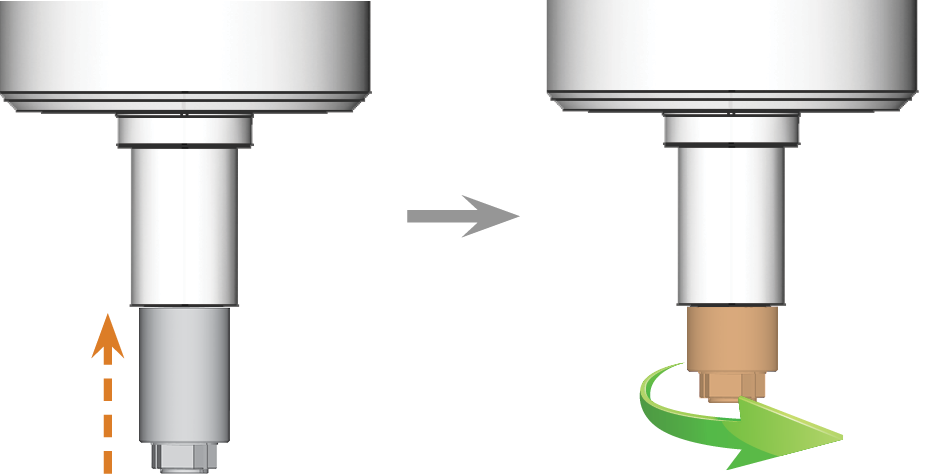
Insert the collet chuck into the spindle. Screw in the collet chuck by twisting it clockwise by hand.
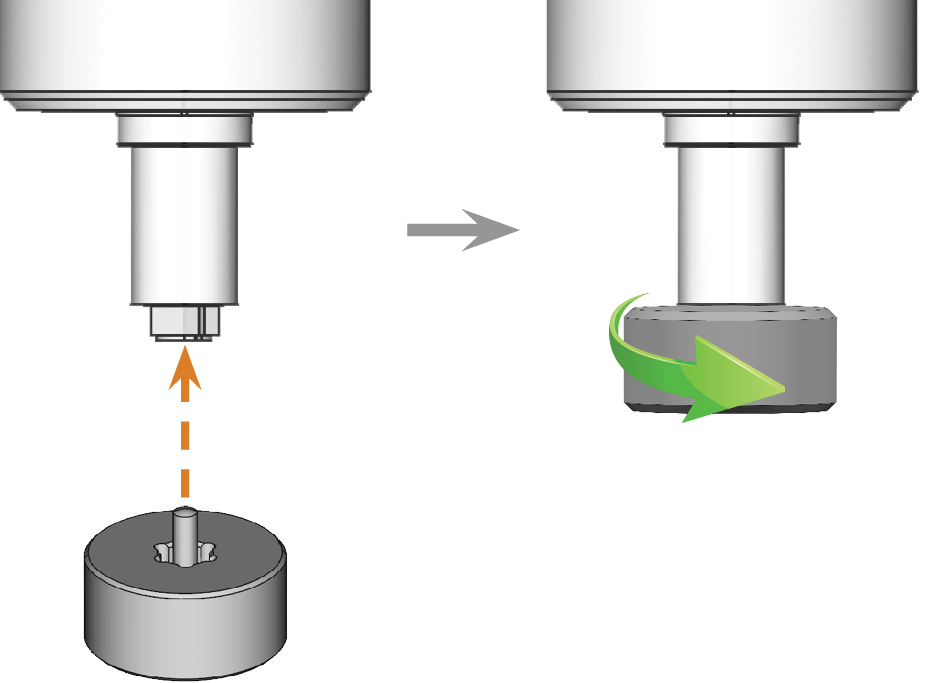
- Tighten the collet chuck with the knurled nut with pin:
Insert the pin of the knurled nut into the collet chuck.
Make sure that the collet chuck is properly seated in the recess of the knurled nut.
Turn the knurled nut clockwise until the collet chuck fits tightly in the spindle.
-
Store the spindle service set in a safe place.
NOTICE! Rotational imperfections when the collet chuck is not tightened properly.
Step 1: Removing the collet chuck
-
Have the spindle service set ready.
-
Have the collet wrench ready.
- Close the working chamber door.
-
Open the Service Assistant with the following icon in the Main icon bar:

-
For the Exchange spindle collet chuck task, select the Start button.
-
The spindle moves into the position for collet chuck cleaning.
- Open the working chamber door.
-
CAUTION!Wear gloves.
- Loosen the collet chuck with the collet wrench:
Insert the pin of the collet wrench into the collet chuck.
Make sure that the collet chuck is properly seated in the recess of the collet wrench.
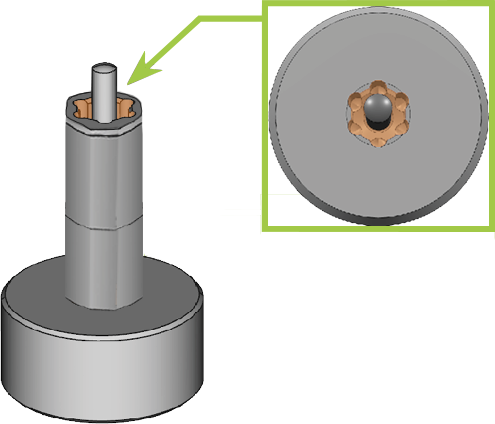
Turn the collet wrench counterclockwise.
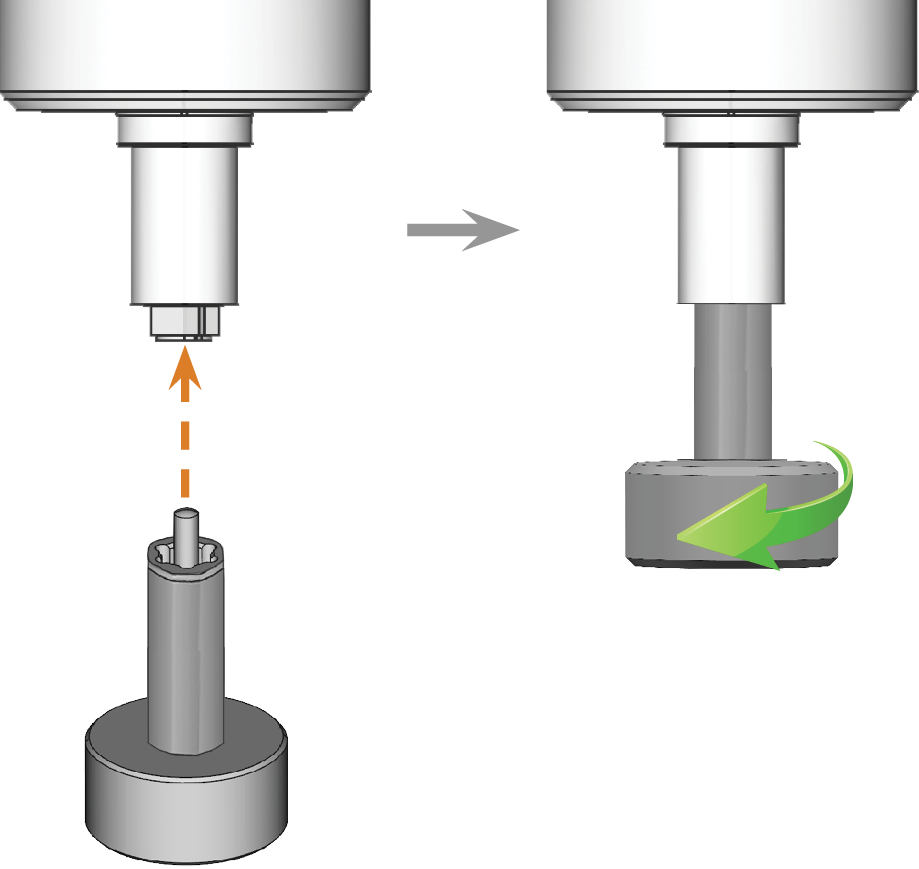
-
Unscrew the collet chuck by hand and remove it.
- Put the collet wrench and the collet chuck aside within reach.
- Clean the inner cone of the spindle with the cleaning cone of the service set.
Step 2: Cleaning the collet chuck
-
Clean the collet chuck with the brush of the service set.
-
Insert the brush into the collet chuck until the end of the brush aligns with the end of the collet chuck.
Do not push any further because otherwise dirt my get into the thread of the collet chuck.
-
Rapidly pull the brush out of the collet chuck and twist it at the same time.
-
Repeat the last 2 steps multiple times.
-
-
Thoroughly clean the complete outer surface of the collet chuck with a clean and dry cloth.
Step 3: Greasing the collet chuck
Damaging of the spindle when using the wrong grease or applying the grease incorrectly
If you use unsuitable grease or if grease gets into the longitudinal slots of the collet chuck, the machine may get damaged.
- Before applying the grease, ensure that the collet chuck is perfectly clean.
- Ensure that no grease gets into the longitudinal slots of the collet chuck.
- Only use a very small amount of grease, less than the size of a pinhead.
- Only use the provided grease of the service set.
- Put a small amount of the collet grease on the index finger and smear it with the thumb.
- Apply the smeared collet grease to the flanks of the collet chuck.
Step 4: Inserting the collet chuck
-
Insert the collet chuck into the spindle. Screw in the collet chuck by twisting it clockwise by hand.
- Tighten the collet chuck with the collet wrench:
Insert the pin of the collet wrench into the collet chuck.
Make sure that the collet chuck is properly seated in the recess of the collet wrench.
Turn the collet wrench clockwise until you hear a slight click from the collet wrench. The preset torque has now been reached.
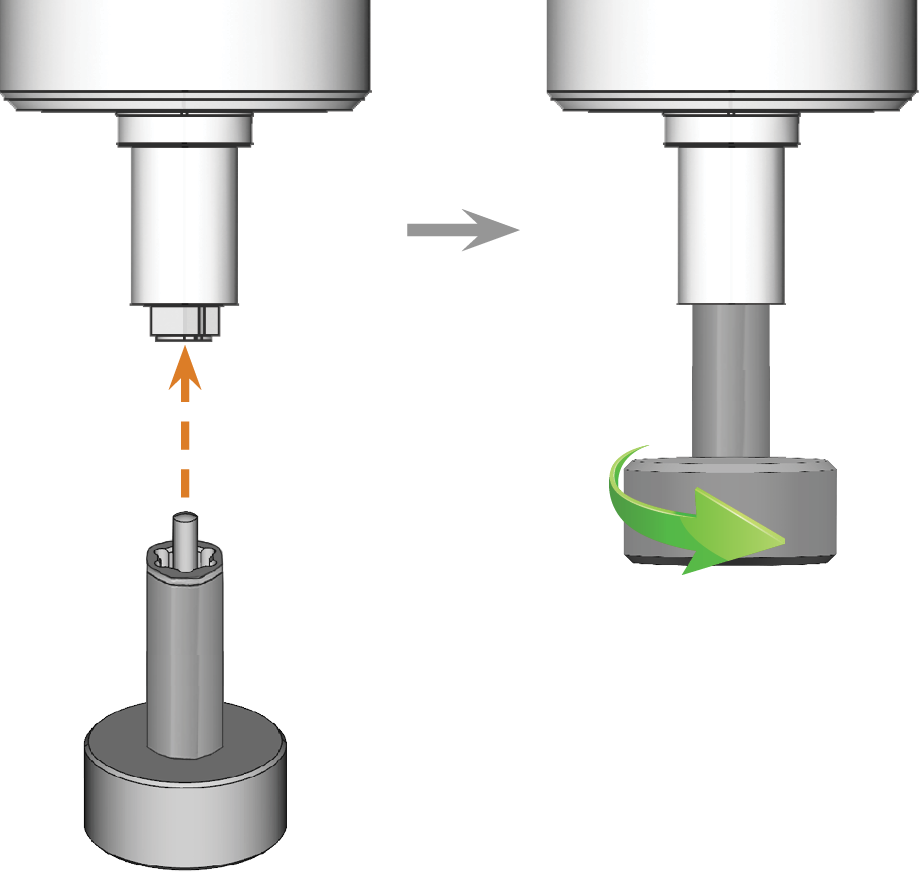
-
Keep the spindle service set and the collet wrench in a safe place.
We recommend that you keep the collet wrench in the box that came with the spindle service set.
NOTICE! Rotational imperfections when the collet chuck is not tightened properly.


