Milling thermoformed dental splints
Introduction
Certain vhf machines enable the mechanical separation of dental splints that have been created by thermoforming on an individually modeled carrier material. Machining thermoformed dental splints requires special attention to a few items if you want to achieve perfect results.
You should observe these points in general, regardless of the machine and the individual job:
-
Clean the working chamber regularly, especially the collet chuck and the blank holder.
-
Make sure that you are using the correct tool and that it is not worn out.
Machines and tools suitable for milling dental splints
We highly recommend the use of original vhf tools for optimal results and a high service life of your machine and its components.
| Machine | Material | Tool |
|---|---|---|
| E3 | Standard aligner, up to max. 1 mm | P140–R1–60 |
Suitable blanks
The machine can process the following blanks:
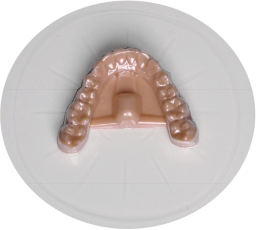
![]()
Thermoformed dental splints on a dental arch model with vhf-specific mounting bracket.
-
The maximum thickness of the dental splint material is specified in TrimCAM .
-
Use dental splint material according to the selection options in TrimCAM.
-
-
The maximum diameter of the dental splint material is 125 mm. Excess dental splint material may need to be roughly removed prior to machining.
The blanks must be prepared individually before being mounted in the machine.
Preparing the blanks: Overview
Prerequisites
-
Suitable dental arch model as STL file from a CAD application
-
3D printing equipment for creating the dental arch model
-
Equipment for thermoforming dental splints
Implementation
-
Create a job in TrimCAM with the dental arch model from your CAD application. Make sure that the requirements for the STL file are met.
TrimCAM adds a vhf-specific mount to the bottom of the dental arch model, for fastening in the machine.
-
Using the 3D printer software, import the modified dental arch model from TrimCAM. The STL file is saved to the export directory that was assigned during the installation of TrimCAM.
-
Print the dental arch model with your 3D printer. Make sure that the requirements for the 3D printout are met.
-
Thermoform the dental splint. When doing this, ensure the following:
-
The dental arch model is positioned in the center of the device.
-
The dental arch model lies on a flat surface and is not embedded.
-
-
Check if the finished blank meets the requirements for successful machining.
Requirements for STL files
-
Use your CAD application to make sure that the exported STL file meets the following requirements:
-
The STL file may only contain one object. Combine existing sub-objects (e.g., individual teeth) into one object.
-
The dental arch model must be adequately high for trim line placement.
-
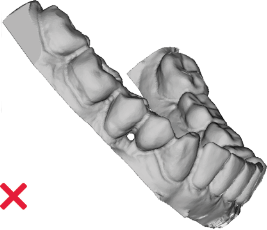
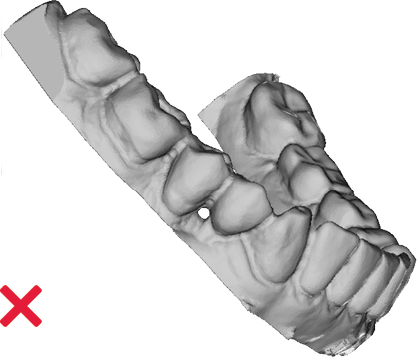
The dental arch model must not contain any holes.
-
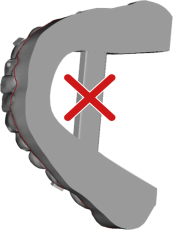
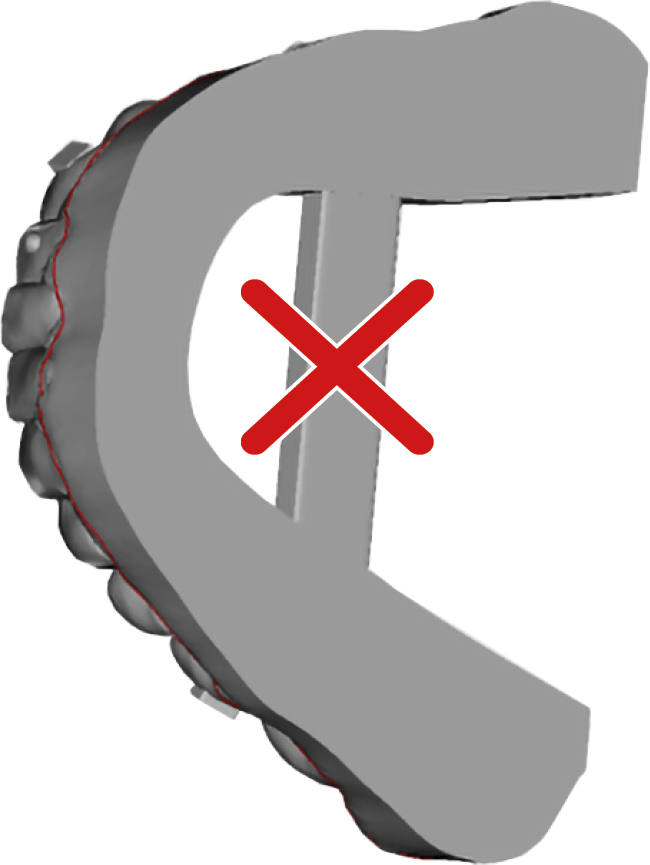
The dental arch model must not contain any cross braces between the rows of teeth.
-
The bottom surface of the dental arch model must be flat.
-
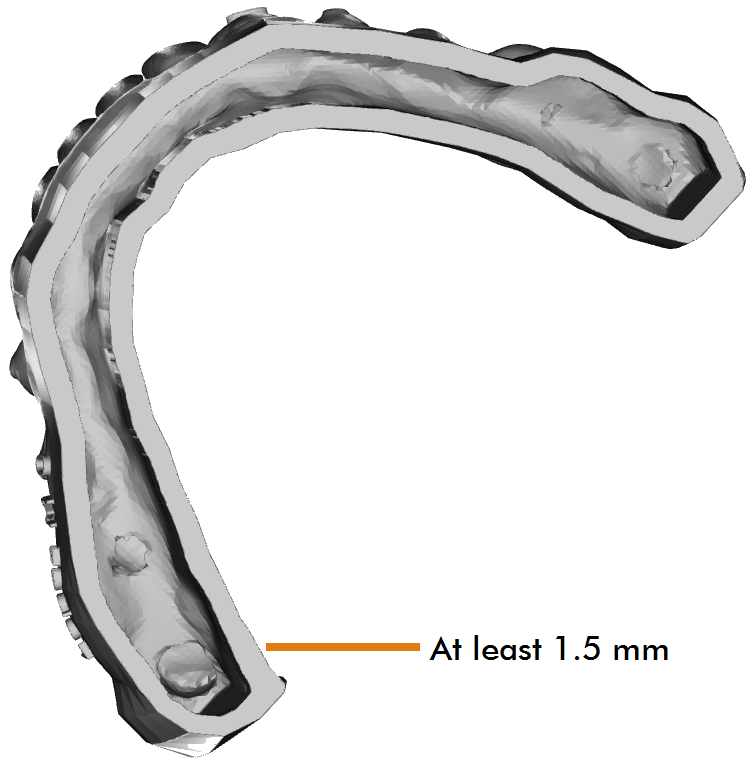
If the dental arch model is hollow, the wall thickness must be at least 1.5 mm.

-
Labels on the teeth should be raised.
-
Labels on the gums should be recessed.
-
Labels must be placed at a sufficient distance to the desired trim line.
-
Labels must not be applied to the bottom surface of the dental arch model.
-
The file name may not contain any umlauts or special characters.
Requirements for 3D printing
-
Please note the following when preparing the model for 3D printing:
-
The best milling results are achieved when the underside of the model is not modified and support structures are avoided.
-
If support structures are necessary:
-
Support structures on the flat underside must be able to be removed without residue.
-
Do not place support structures into the mounting bracket.
-
-
If a drainage opening for resin is required on mounting bracket, this must be placed in the large recess of the mount.
-
Do not use raised labels / markings.
Orange: Only removable support structures
Red: No support structures
-
Prepare the dental arch model after printing:
NOTICE! Pay attention to the information on cleaning and curing in the documentation for the printer and the resin.
-
Resin printer: Clean the dental arch model before final curing. In particular, remove all residue from the mounting bracket. Use a brush if necessary.
-
Resin printer: Allow the dental arch model to cure for the last time.
-
Check if the geometry of the dental arch model is correct.
-
Remove the support structures completely.
-
Filament printer: If necessary, remove residue from the transitions between contours.
Requirements for the finished blank
-
Make sure that the finished blank fulfills the following requirements. Otherwise the machining may not be successful.
-
The dental arch model is located in the center of the finished blank.
-
The mounting bracket is correctly designed and symmetrical.
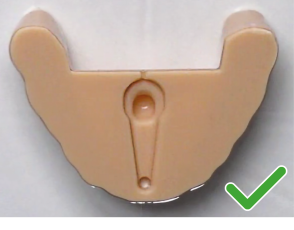
Correct mounting bracket
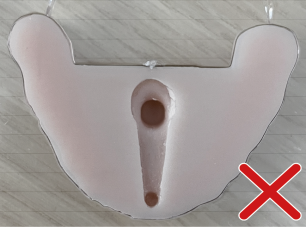
Asymmetrical mounting bracket

Mount with recesses that are too small / inaccessible
If there are errors, you should check if they are already included in the STL file from TrimCAM or if the errors occurred during 3D printing.
-
The blank is free of irregularities on the underside and the mounting bracket is free of residue.
-
During mounting into the machine, the blank locks firmly onto the blank holder and can no longer be moved.