Cleaning the machine
Watch the video

YouTube video – When viewing this video, personal data is sent to YouTube, LLC, USA. Privacy statement
Breathing difficulties caused by processing dust
Processing dust that gets into your lungs can cause breathing difficulties.
- After dry machining, only clean the machine if the air extraction unit is properly installed and activated.
- Wear a face mask of class FFP2 during the entire cleaning.
Damaging of the linear guides or the spindle when cleaning with compressed air
If you clean the working chamber with compressed air, material chips can reach the linear guides or the spindle bearings.
- Never clean the working chamber with compressed air.
Do not pour additional water into the working chamber. The cooling liquid tank may overflow.
Cleaning the working chamber includes the following components:
- Measuring key
- Blank holder
- View window
- Webcam
- Tool magazines
- Tool magazine holder
These components have different maintenance intervals according to the maintenance table. Therefore, depending on the components that need to be cleaned, perform daily or weekly cleaning of the working chamber.
- When performing the weekly cleaning, also perform the daily cleaning.
Performing the daily cleaning
- Have ready:
- A wet cloth
- A mild cleaning agent (optional)
- A dry cloth (if the machine was used for dry machining only)
- A suction unit
- Close the working chamber door.
 Move the axes into the cleaning position by selecting the depicted icon in the Machining view in DentalCNC.
- Open the working chamber door.
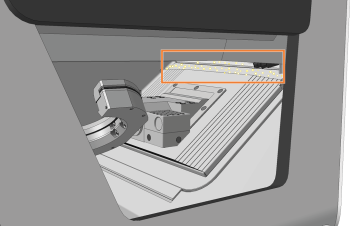
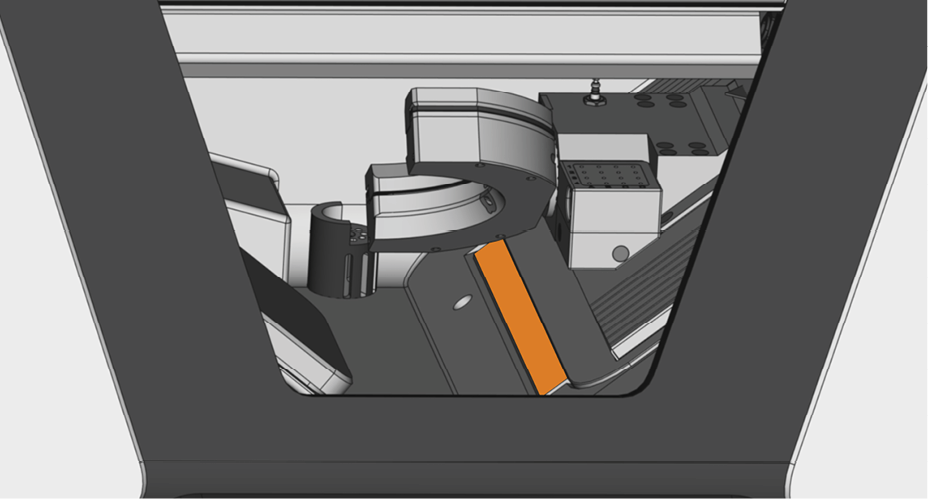
- Lift the protective strip (marked orange) at the left side and pull it out of the machine. Clean it thoroughly.
- If the machine was used for dry machining only:
- Suck up the coarse dirt in the working chamber with the suction unit.
- Clean all surfaces and cracks in the working chamber thoroughly with the dry cloth. Use a mild cleaning agent if necessary.
-
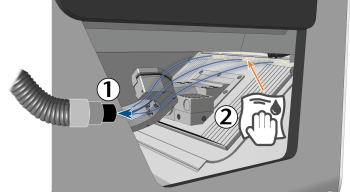
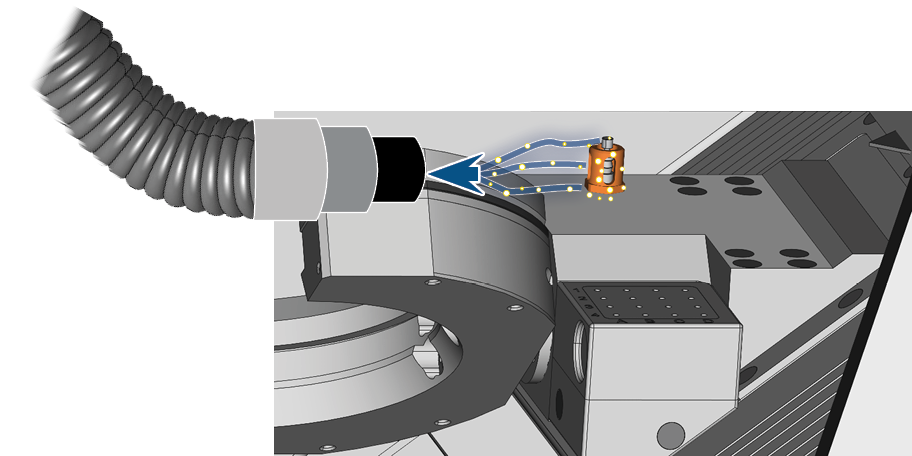
- Suction any machining residue off of the measuring sensor from a distance of 3 cm.
- Clean all sides of the blank holder with a brush. Especially clean all openings and movable parts of the blank holder.
- Allow the working chamber to dry.
- Install the protective strip in the working chamber:
- Orient the protective strip so that the magnets (marked orange) are on the right bottom side.
- Align the right and the bottom edge of the protective strip (colored green) with the imaginary orange lines which are depicted in the following illustration:
- Push the protective strip to the right until it snaps in place.
- The protective strip is immobilized by the magnets.
-
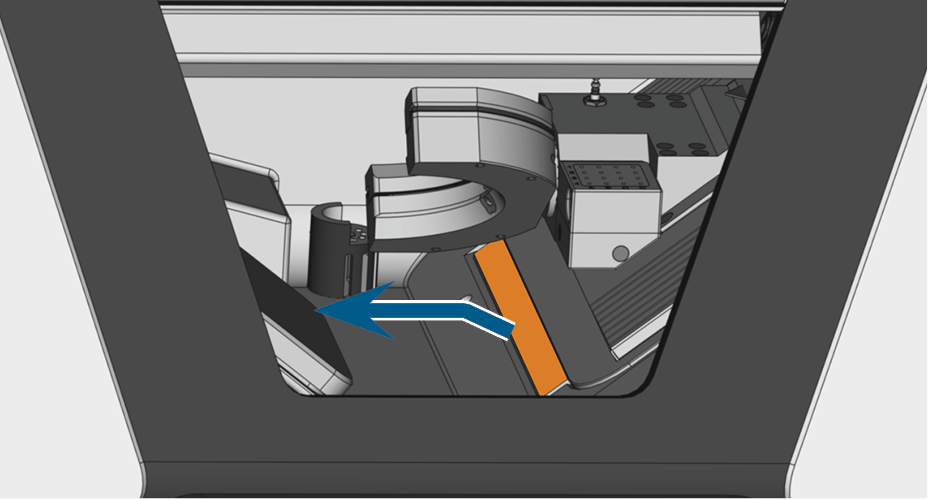
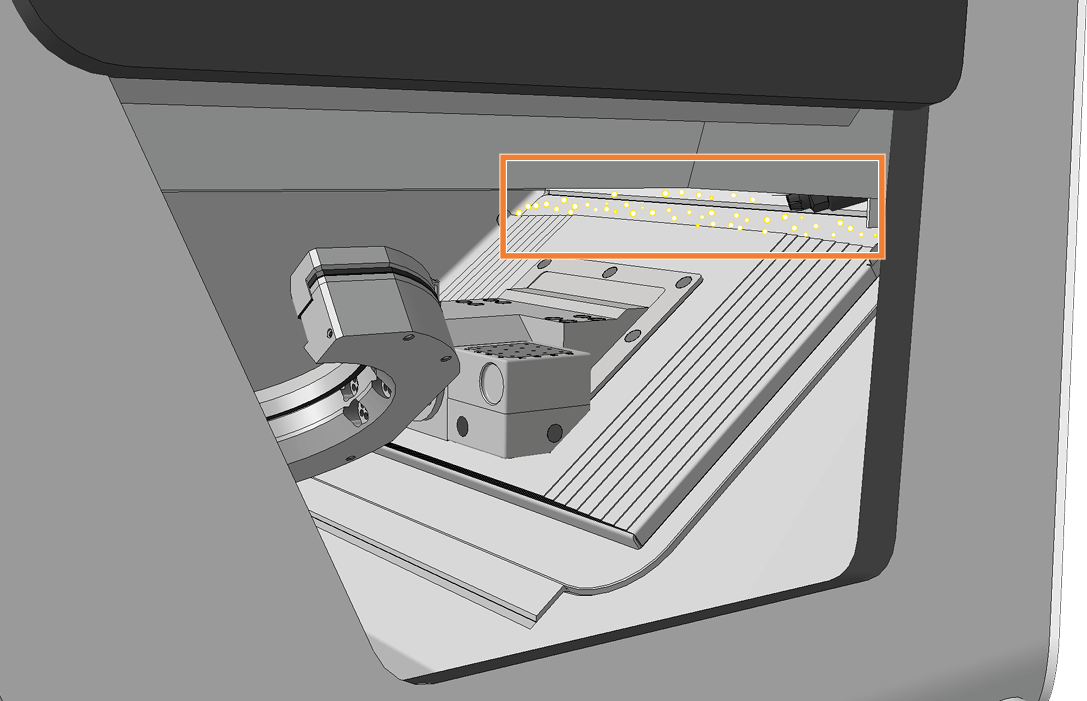
Remove all machining residues above the slats on the right side (area marked orange):
-
Use a suction unit for rough cleaning.
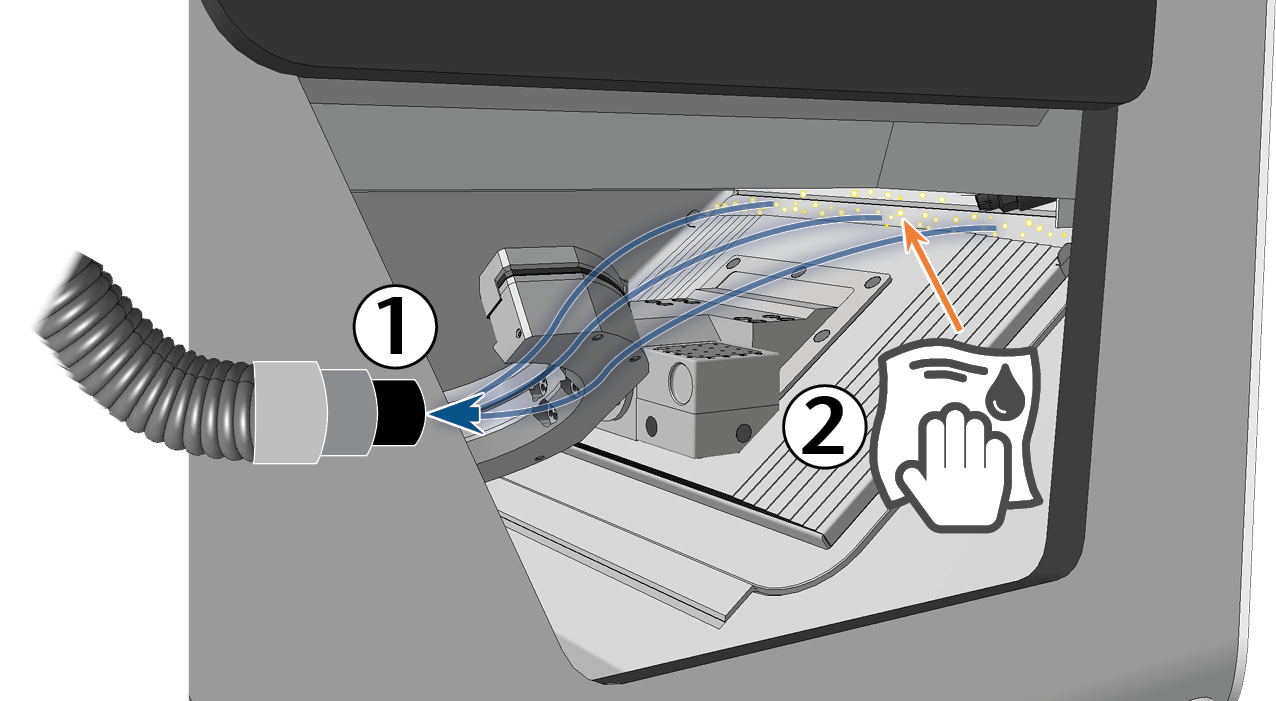
-
Use a cloth for thorough cleaning.
-
-
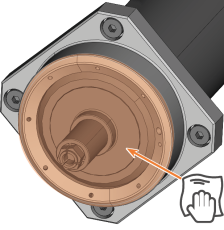
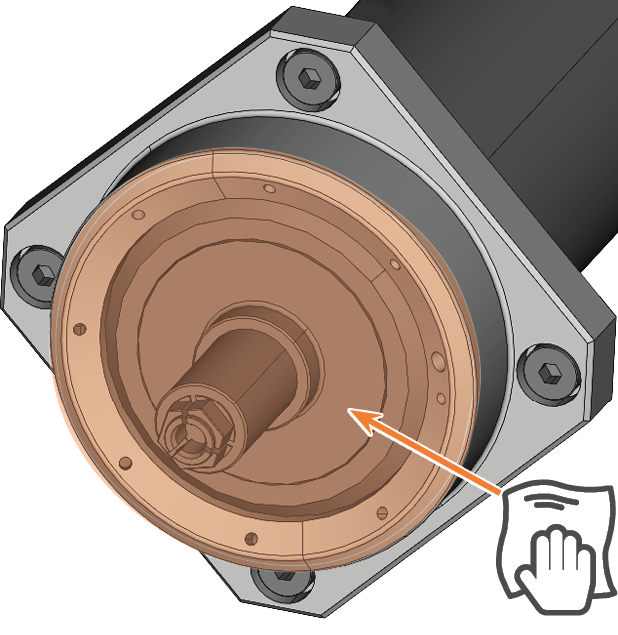
Wipe the nozzle plate of the spindle with a cloth.
- Close the working chamber door.
 Move the axes into the default position by selecting the depicted icon in the Machining view in DentalCNC.
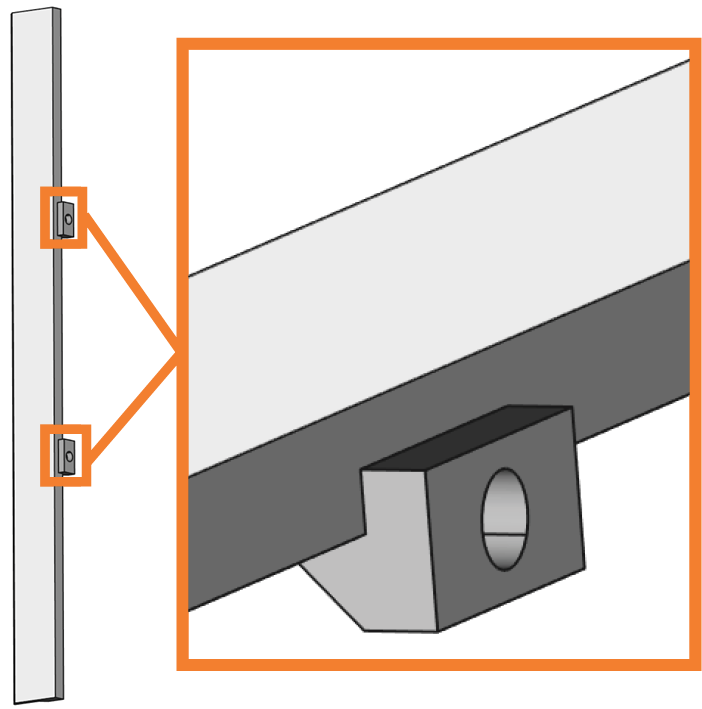
Correct orientation of the protective strip for installation
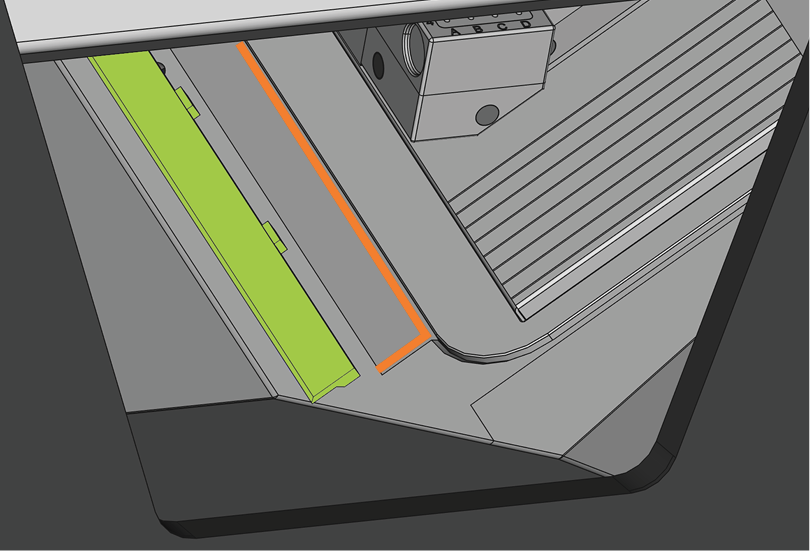
Correctly installed protective strip (marked orange)
Performing the weekly cleaning
Cleaning the working chamber
- Perform the daily cleaning.
- Have ready: The cleaning brush for the blank holder.
- Close the working chamber door.
- Move the axes into the cleaning position by selecting the depicted icon in the Machining view in DentalCNC.
- Open the working chamber door.
- Remove the tool magazine from the working chamber. Clean it with a suction unit and a damp cloth.
- Clean the tool magazine holder with the damp cloth.
- Apply a bit of collet chuck grease to the bolts of the tool magazine holder.
- Plug the tool magazine onto the holder.
- Screw the protective cap off the webcam and clean the inside of the cap with a dry cloth.
- Clean the webcam with a wet cloth. Screw on the protective cap.
-
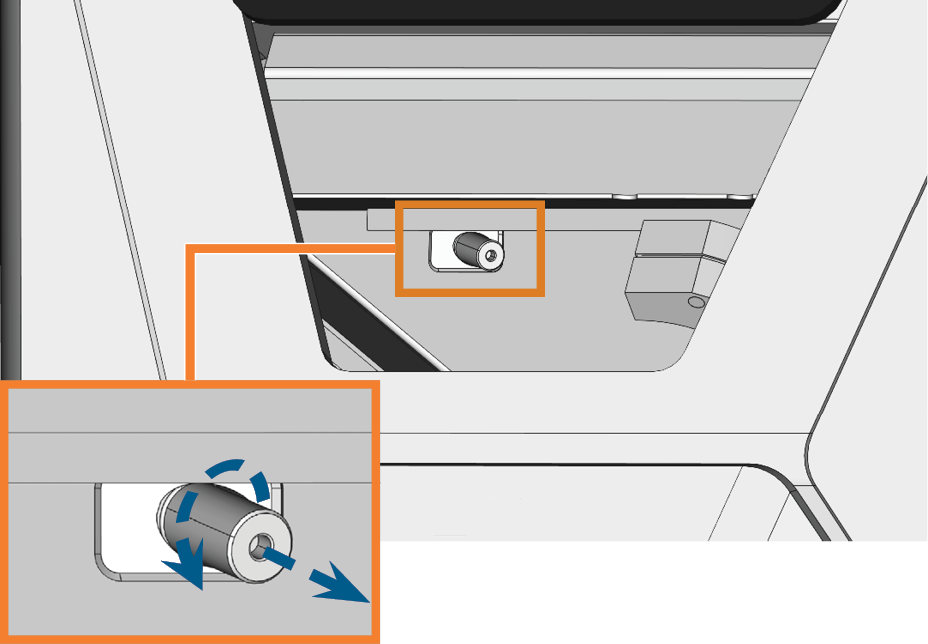
To clean the filter of the working chamber ventilation, do the following:
This filter is only used in machines with serial numbers starting with R5ID7.
-
Pull down the filter (marked orange) and remove it from the working chamber. Use the recess (marked blue) of the filter.
-
Clean the filter screen (marked orange) with a suction unit or compressed air.
-
Clean the magnets (marked blue) and the contact surfaces of the filter and the working chamber with a cloth.
-
Align the recesses (marked blue) of the filter with the screws (marked orange) of the working chamber ventilation and position the filter. The filter is held in place by magnets.


-
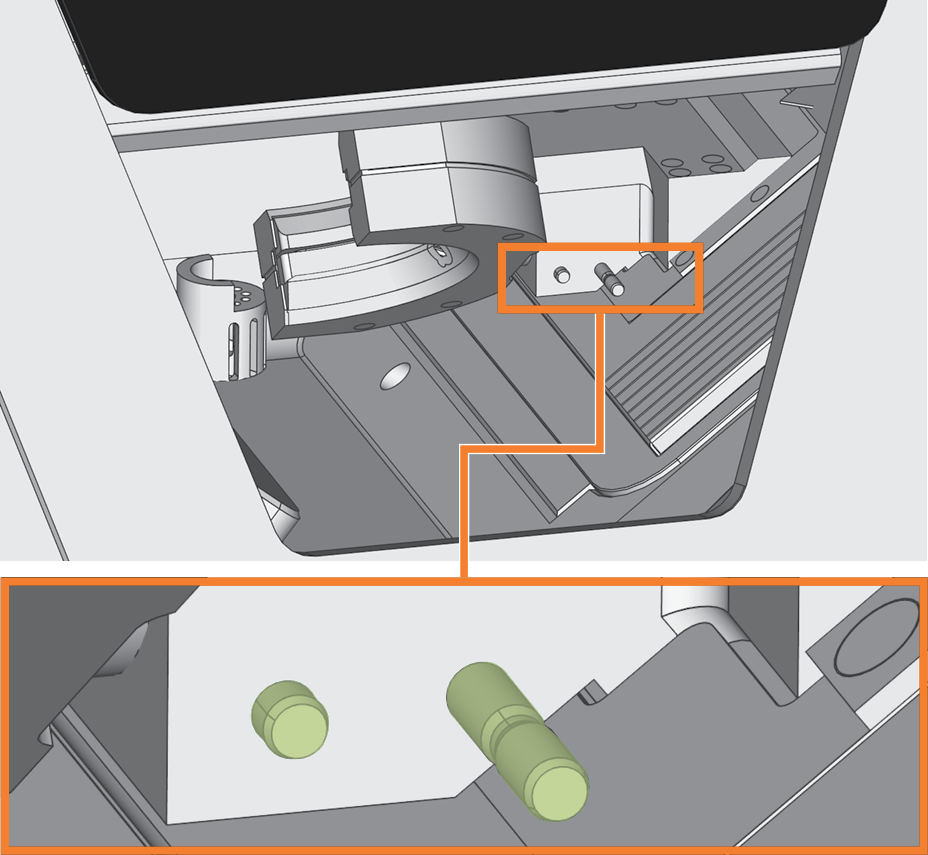
The bolts of the magazine holder (colored green)


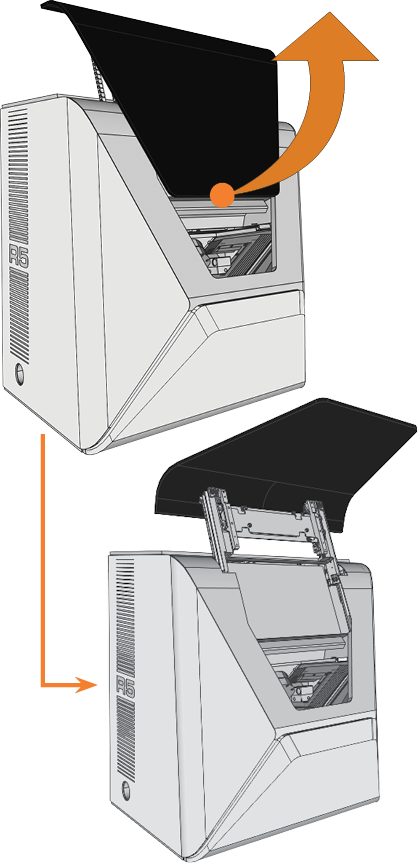
- Grab the working chamber door at the middle of the lower edge and fold it upwards.
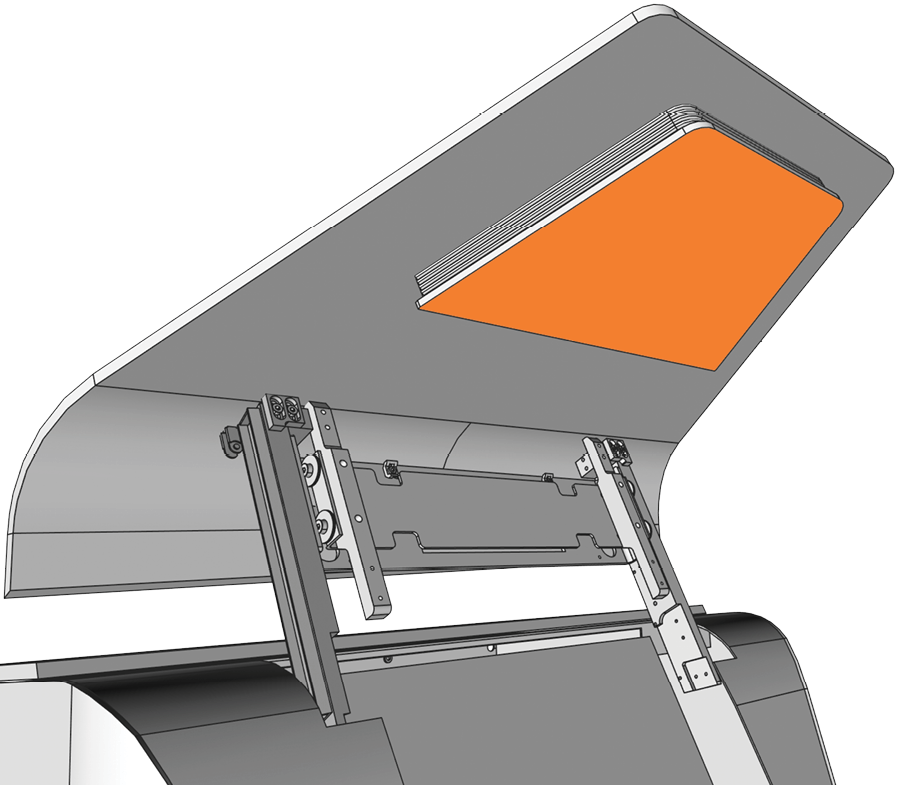
- Clean the inside of the view window (marked orange) with a wet cloth. If necessary, use a mild cleaning agent.
- Grab the working chamber door in the middle of the bottom edge and fold it downwards.
- The working chamber door is locked in place.
- Close the working chamber door.
- If DentalCNC displays a message that you need to fold down the working chamber door, the door is not completely fold down. Repeat the 2 previous steps.
)
- Open the multi-purpose compartment.
- Remove all items from the blank magazine
 Part of the blank changer in which you store the blanks for automatic loading..
 - Clean the blank magazine Part of the blank changer in which you store the blanks for automatic loading.. Clean the fixing levers very thoroughly.
- Remove the cooling liquid tank.
- Clean all surfaces in the multi-purpose compartment.
Cleaning the housing
-
Clean the housing:
-
Clean the surface with a dry microfiber cloth.
Be careful not to detach the symbol stickers. The adhesive foil is especially sensitive to friction and harsh cleaning agents.
-
If some dirt cannot be removed this way, moisten the cloth. Use a pH neutral cleaning agent if necessary.
-
Avoid exposing the surface to alkaline or acidic substances. Metallic powder coating materials are especially sensitive.
-
If a special cleaning agent is used to remove certain impurities, check the suitability of the agent in advance at a hidden location on the painted part.
-
NOTICE! Housing damage caused by incorrect aids and cleaning
-