Creating a shared blank archive
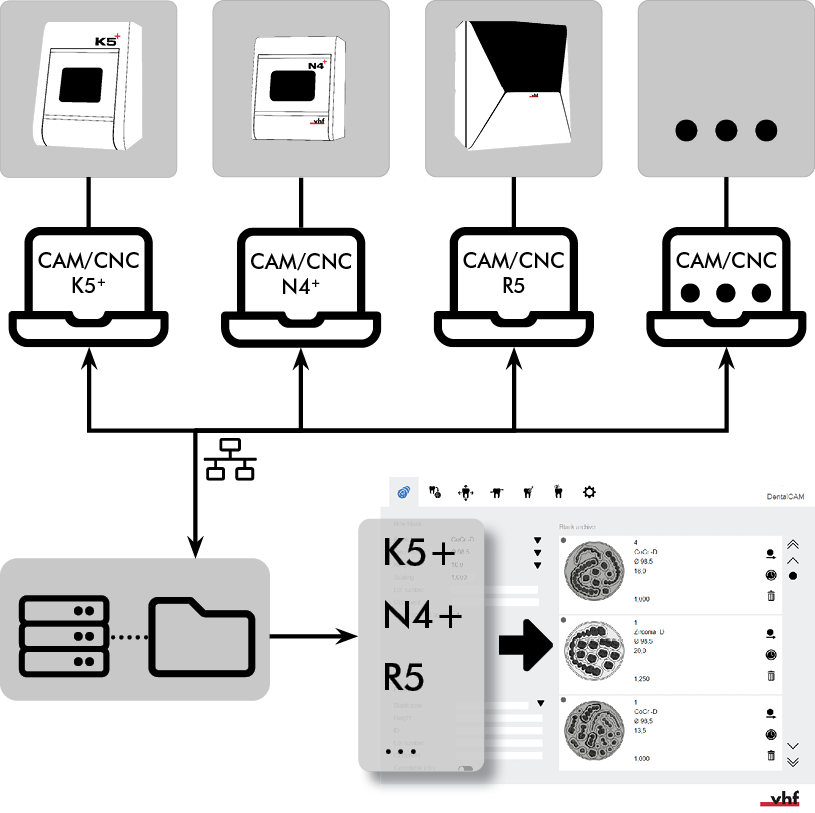
If multiple CAM computers![]() The computer that is connected to your machine and which runs DentalCAM and DentalCNC. (“Clients”) need to share a blank archive, create a shared blank archive folder and share it on your network.
The computer that is connected to your machine and which runs DentalCAM and DentalCNC. (“Clients”) need to share a blank archive, create a shared blank archive folder and share it on your network.
This function requires special care during setup and use.
The feature is not restricted to the mentioned machine
Setting up a shared blank archive
-
Note the following requirements:
-
Access to the shared archive folder must be guaranteed without interruption for each active client (CAM computer
 The computer that is connected to your machine and which runs DentalCAM and DentalCNC.).
 -
You can use 1 existing archive as the basis for the shared archive. Combining multiple archives is not possible, otherwise blank IDs will be duplicated.
-
Recommendation: Create backups of the archive folder automatically at regular intervals. This helps to restore an older version in the event of conflicts due to changes made to blanks by different clients.
-
-
If you want to use your DentalCAM 7 archive as the basis for the shared archive, import it.
In the next step, copy the imported data in the archive folder to the shared folder.
-
Create the shared folder and set the path to the folder for all clients in the general application settings of DentalCAM.
Follow these instructions for this: Archive folder
-
Inform all users of DentalCAM how to work with a shared blank archive and about the mounting positions of discs.
Working with a shared blank archive
The following information must be known to each user:
-
The blank archives on the individual clients are filtered as follows:
-
Discs are only displayed if they can be machined with the configured machine type.
Example: A titanium disc created on a R5 client (requires wet machining) is not displayed on a K5+ client.
-
Blocks and abutments are displayed only on clients of the same machine type for which the blank was created.
-
-
If more than one client tries to load the same blank, DentalCAM will display a corresponding error message.
The blank can be released for machining again as follows:
-
By loading another blank on the client that opened the blank. Moving to the blank archive is not sufficient.
-
By closing DentalCAM on the client that opened the blank.
-
-
If you open non-calculated job on a client with a different machine type, the nesting of the objects may change. This is caused by the different blank holders of the machine types.
-
The speed of the network determines the speed at which a blank is loaded.
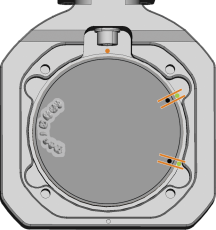
Mounting positions of discs
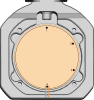
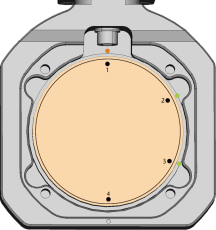
The safe remounting mark is located at different positions for different machine types. It may therefore be misleading when remounting a disc following a machine change.
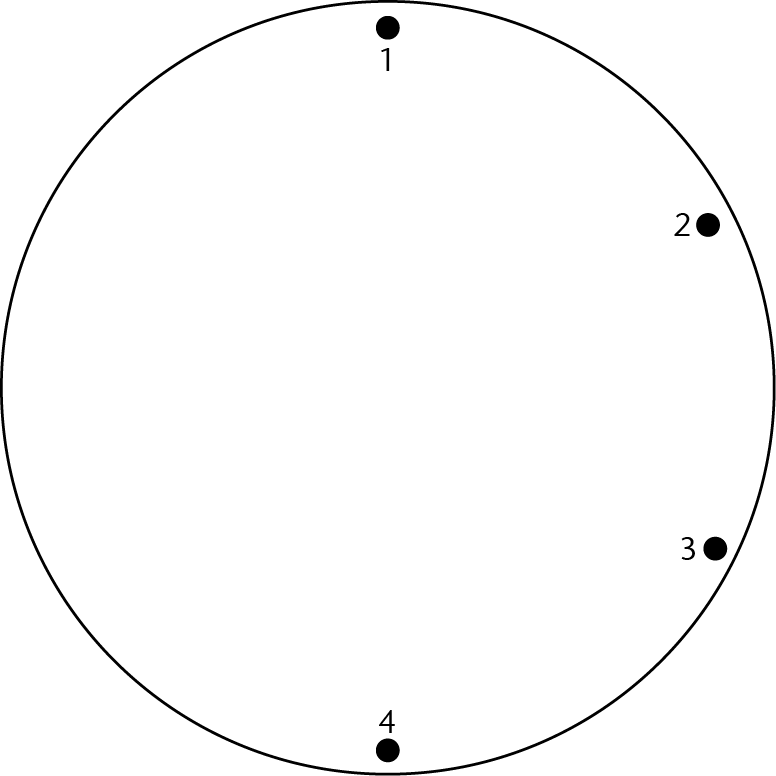
Disc with mounting positions of all current series
-
R5/K4 edition
-
S2/S5
-
S2/S5
-
-
Mark the different marking positions on the blank holders of all the machines used with our stencil.
Marking blank holders with a stencil
-
Download the template: Download
-
Print the stencil. Make sure that the printing settings do not distort the dimensions.
-
Cut out the stencil.
-
Recommendation: Glue the stencil to a disc, e.g. to a calibration blank. The stencil and the disc surface must be identical.
Alternative: Use the stencil without disc.
-
Mount the disc with the stencil or the stencil in the first machine.
-
Align the mark for the machine used on the stencil to the mark on the blank holder.
-
If you use the stencil without disc, the stencil must be flat inside the blank holder.
Example: You insert the stencil into a K5. Rotate the stencil until the mark for the K5 matches the mark on the blank holder.
-
-
Mark and label the mounting positions for the remaining machines on the blank holder.
Tip: Use waterproof pens with different colors.
Example: You mark the K5 blank holder with orange for mounting position 1 and with green for mounting positions 2 and 3. The mark already on the blank holder marks position 4.
-
Repeat the last two steps for the remaining machines.
Using marks for remounting
-
Mount the disc with the correct alignment:
The mark on the disc must be aligned with the mark on the blank holder for the original machine.
With the following machines, 2 marks are applied to the disc: K4 edition, S2, S5.
Example: Mount a disc that was originally machined on a S5 in a K5. Align the disc to the marks for the S5: