Marking the matrix and patrix of attachments

The patrix and matrix of attachments must be marked manually for optimum manufacturing. This allows for the necessary grinding repetitions and the use of activated optional tools.
Marking the matrix
Requirement An object in the blank has a matrix.
-
Activate the top view with
 .
-
Select the desired object in the blank display.
-
Open the Select matrix/patrix editing function with
 .
-
-
Use and to switch between the individual editing steps.
-
You can discard all changes with
 any time and close the editing function.
-
-
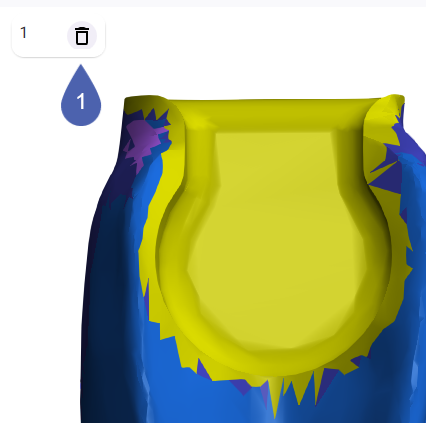
To delete an existing marking, select
 in the upper-right corner of the blank display.
-
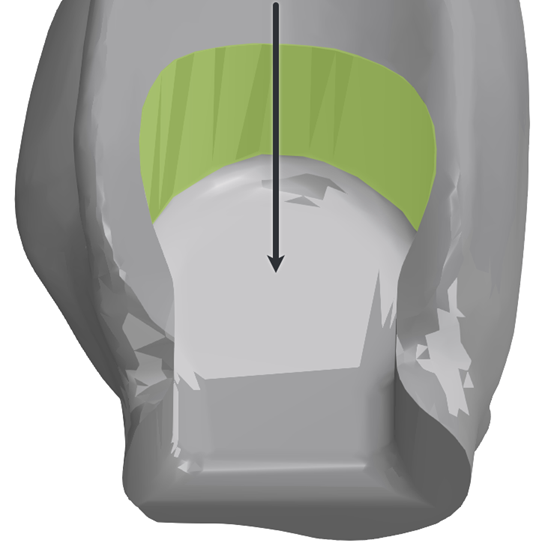
Select the perspective so that you are looking into the matrix from the insertion direction of the patrix.
-
Choose a steep angle, but not a top view.
-
You must be able to see the wall that is parallel to the insertion direction of the patrix.
-
Arrow
-
Insertion direction of the patrix
-
Green marking
-
Wall parallel to the insertion direction
-
-
Click here to proceed to the next editing step.
-
Select 2 points on the wall that are parallel to the insertion direction of the patrix. Leave some space between the points.
- dentalcam calculates the shape of the matrix and marks it accordingly:
- Turquoise balls: The area is part of the attachment.
- Black balls: The area is not part of the attachment.
If the marking is outside the patrix, the angle in the last step was not steep enough. Go back to the previous step and correct this.
-
If necessary, correct the marking.
-
Select a black sphere to extend the marking to that sphere.
-
Select a turquoise ball to reduce the marking to this ball.
-
-
Save the marking with OK.
- dentalcam marks the matrix yellow.
-
Close the Mark patrix/matrix editing function with
.
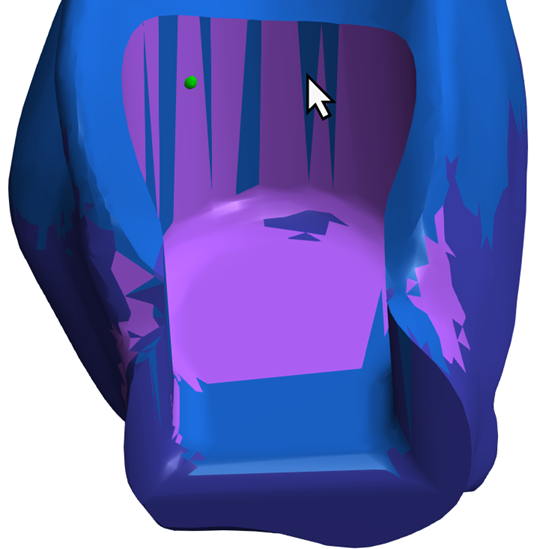
Example: The first point is set; the second point still needs to be selected
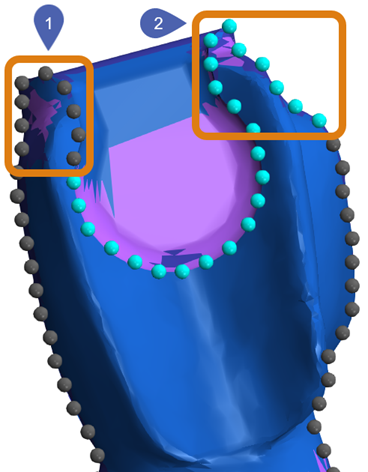
Example: Calculated contour of the attachment with marked errors
|
1 |
The marked area is too small |
|
2 |
The marked area is too large |
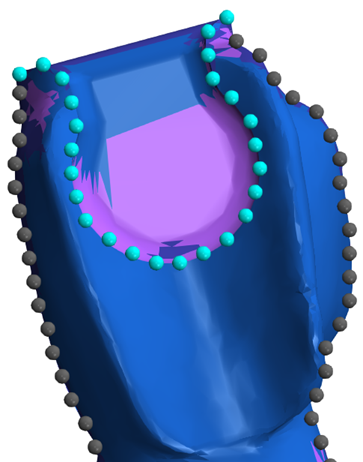
Corrected marking on a matrix.
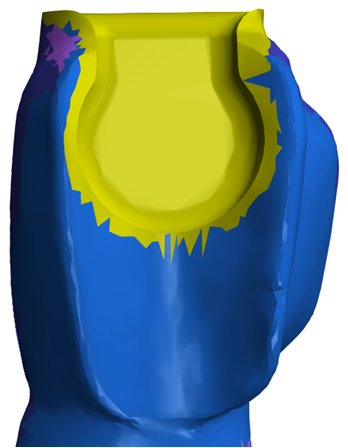
A successfully marked matrix
Marking the patrix
Requirement An object in the blank has a patrix.
-
Activate the top view with
. -
Select the desired object in the blank display.
-
Open the Select matrix/patrix editing function with
. -
-
Use and to switch between the individual editing steps.
-
You can discard all changes with
any time and close the editing function.
-
-
To delete an existing marking, select
in the upper-right corner of the blank display.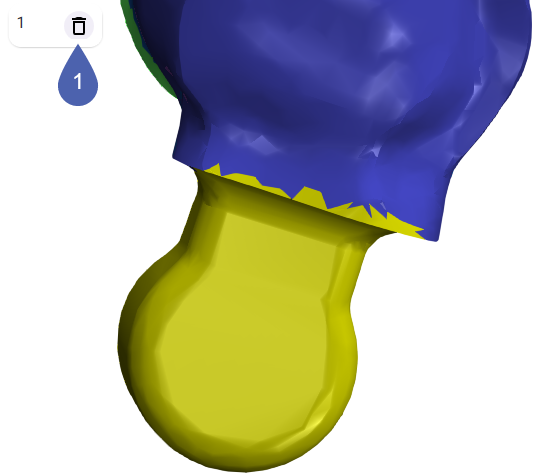
-
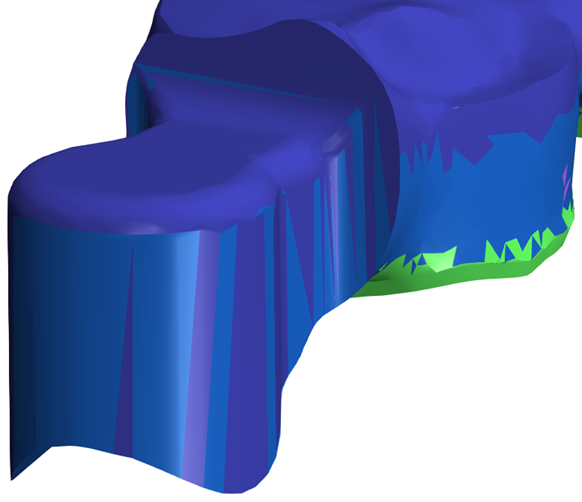
Select the perspective that allows you to see the outer contour of the matrix.
-
Click here to proceed to the next editing step.
-
Select 2 points on the outer contour of the patrix. Leave some space between the points.
- dentalcam calculates the shape of the matrix and marks it accordingly:
- Turquoise balls: The area is part of the attachment.
- Black balls: The area is not part of the attachment.
-
If necessary, correct the marking.
-
Select a black sphere to extend the marking to that sphere.
-
Select a turquoise ball to reduce the marking to this ball.
-
-
Save the marking with OK.
- dentalcam marks the patrix yellow.
-
Close the Mark patrix/matrix editing function with
.
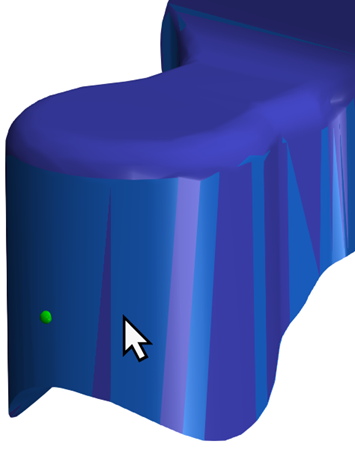
Example: The first point is set; the second point still needs to be selected
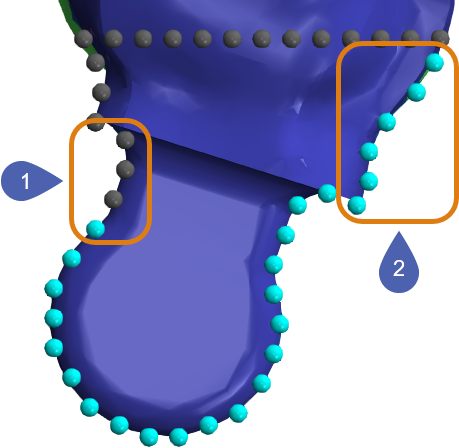
Example: Calculated contour of the attachment with marked errors
|
1 |
The marked area is too small |
|
2 |
The marked area is too large |
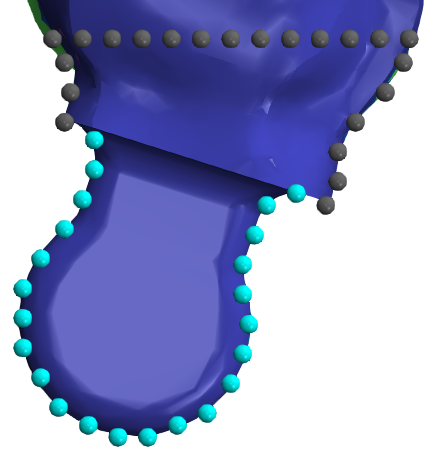
Corrected marking of a patrix
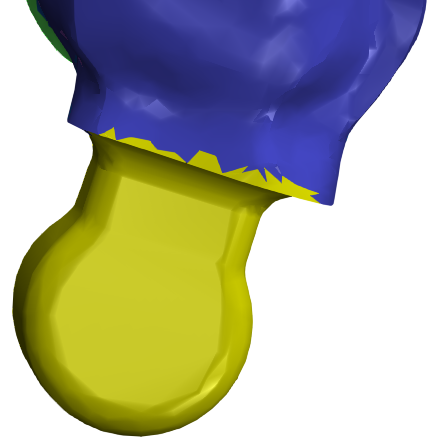
A successfully marked patrix


