Activate and deactivate the anterior tooth region
The Anterior tooth region editing function can be used to reduce the amount of residual material caused by narrow interdental spaces or undercuts when manufacturing anterior tooth surfaces. The surfaces are manufactured at a 90° angle using a specially adapted strategy.

Example: Anterior tooth without anterior tooth manufacturing

Example: The same anterior tooth with anterior tooth manufacturing
To create access to the object, the machine completely mills away the material at the disc rim above the object.
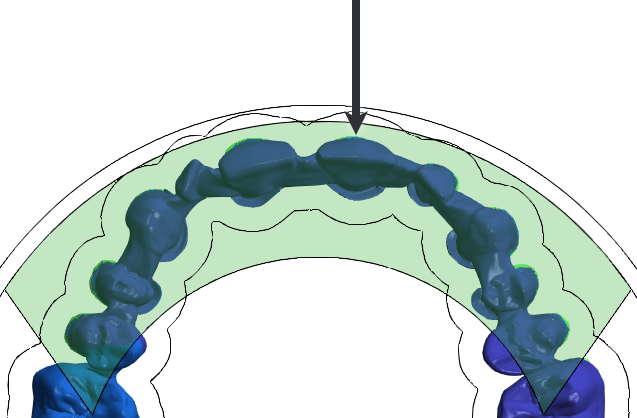
-
Arrow
-
Tool insertion direction
-
Green marking
-
Anterior tooth region
Applications
-
The function is mainly intended for anterior tooth manufacturing, but it can also provide benefits for other types of teeth.
-
The function is mostly used for multi-unit bridges, but is not limited to any indication.
-
For improved manufacturing quality, activate the associated optional tools.
-
Manufacturing time increases due to the additional milled area.
Recommendation: If you cannot achieve a relevant reduction in residual material with anterior tooth manufacturing, leave the function deactivated.
Activate the anterior tooth region
Prerequisites
-
You are using the following machine: E5.
-
You are nesting a disc.
Recommendation: To ensure tool-friendly manufacturing and proper fixation of the disc, do not use discs with a plastic ring on the outer edge.
-
You no longer need the following editing functions for this object:
-
Changing the orientation
-
Adding/editing a sinter bar
-
You must carry out the following steps for each object in the anterior tooth region:
-
Activate the top view with
 .
-
Select the desired object in the blank display.
-
Open the
 Anterior tooth region editing function.
-
-
Use and to switch between the individual editing steps.
-
You can discard all changes with
 any time and close the editing function.
-
-
Position the desired object in the anterior tooth region marked in green:
-
Turn the object so that the anterior teeth or the geometry to be manufactured at a 90° angle face the upper disc rim.
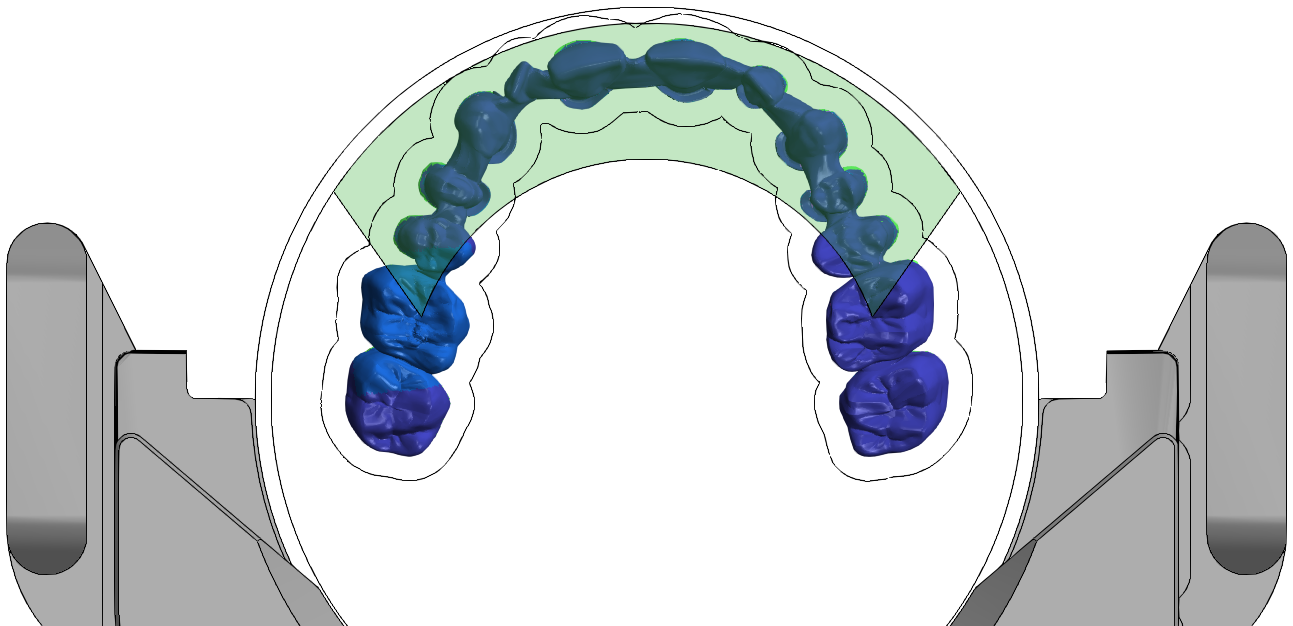
Positive example: Bridge with anterior teeth in the green anterior tooth region
-
Make sure that there is no sinter bar or other object between the current object and the upper disc rim.
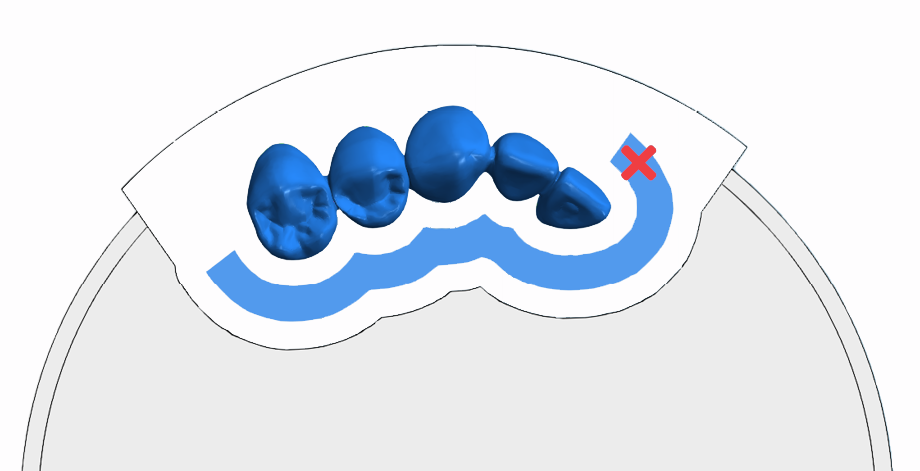
Negative example: Part of the sinter bar lies between the object and the insertion direction of the tool
-
Make sure that neither drill holes nor cavities face the direction insertion direction of the tool.
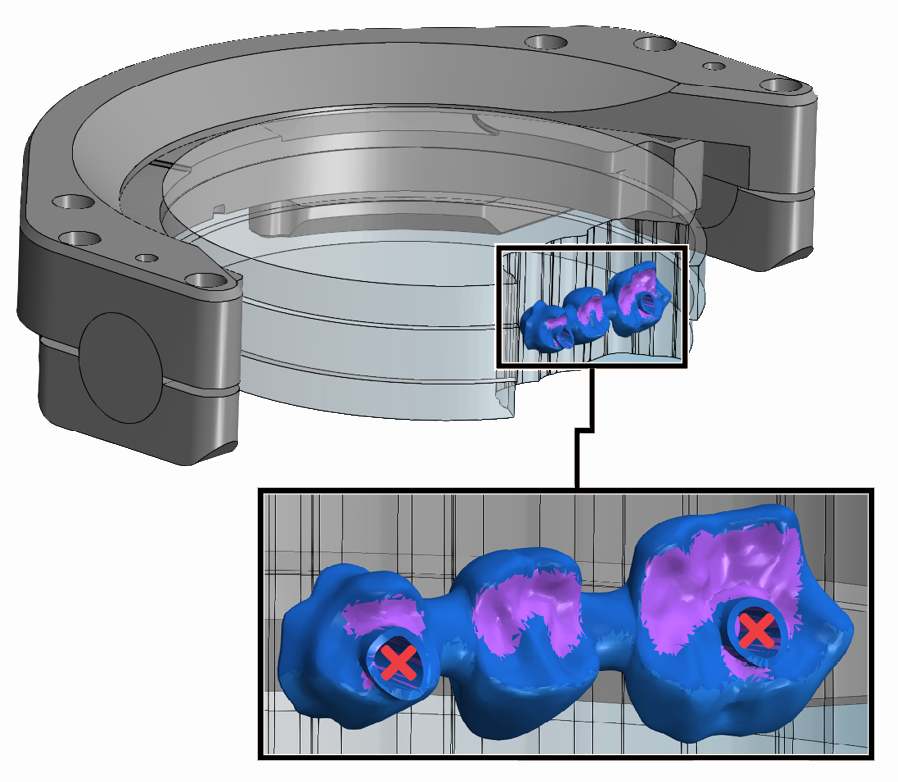
Negative example: The drill holes point in insertion direction of the tool
-
-
Click here to proceed to the next editing step.
-
Use the following icons to specify the side on which the material above the object is to be milled:

Mill both sides (default setting)

Mill the left side

Mill the right side
-
The sides are calculated from the center of the current object. You can therefore adjust the amount of material removed for multiple objects in the anterior tooth region separately and reduce it to what is necessary.
-
The tool must remove enough material above the object so that the tool can process it at a 90° angle.
 Optimizable and appropriate examples
Optimizable
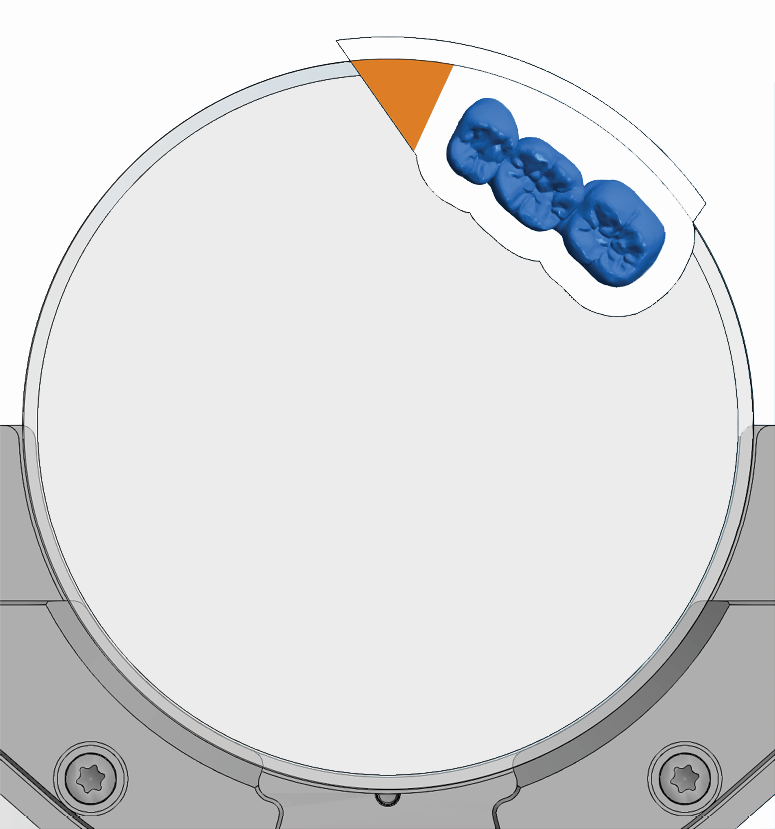
In the following case, only a 3-unit object was positioned on the right side of the anterior tooth region.
The Mill out both sides setting results in an unnecessary amount of material being milled (orange area).
Appropriate
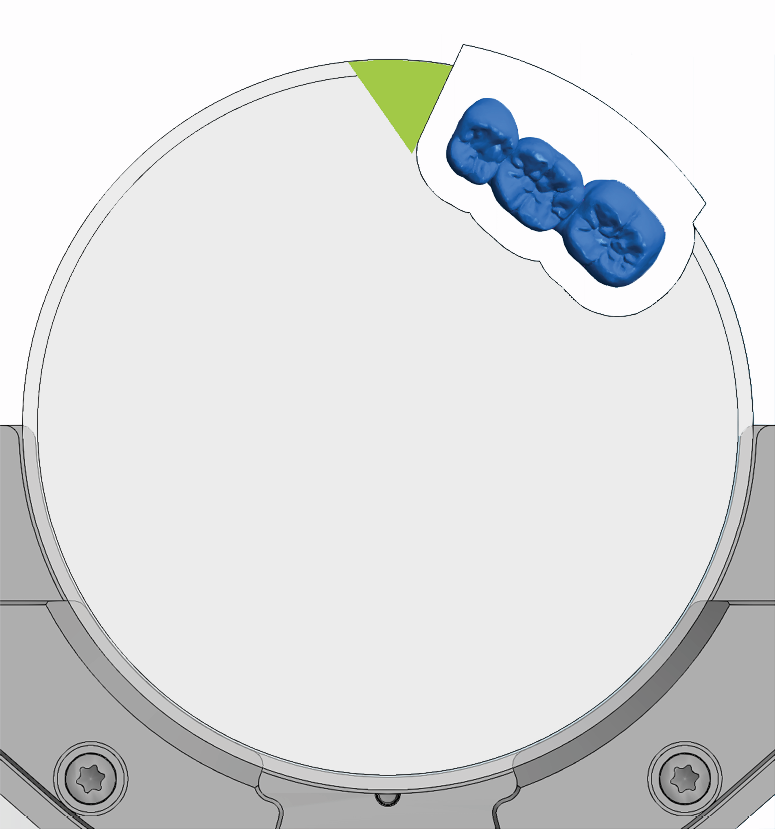
In the following case, the Mill out right side setting means that the area marked in green is not milled. You can position other objects there.
Optimizable
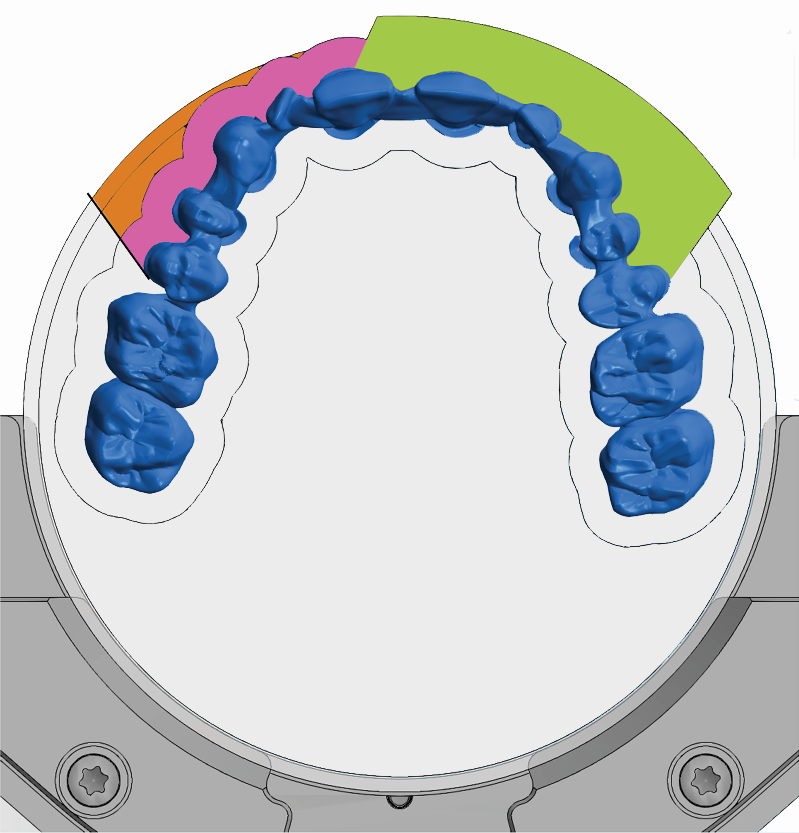
In the following case, Mill right side setting results in material remaining above the object in the orange area. There is no anterior tooth strategy applied in the violet area, although this would be technically possible.
Appropriate
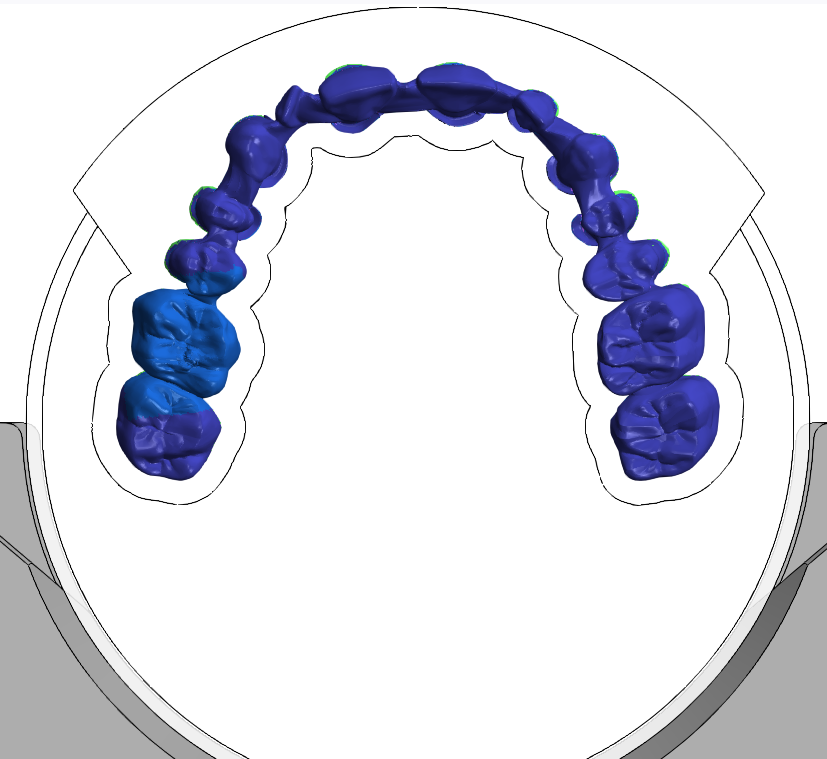
In the following case, the Mill out both sides setting results the in anterior tooth strategy being applied in the maximum possible range:
-
-
Click here to proceed to the next editing step.
-
dentalcam rotates the blank display 180°.
-
Recommendation: Use the mouse wheel to enlarge the view and hold down the right mouse button to move the view.
-
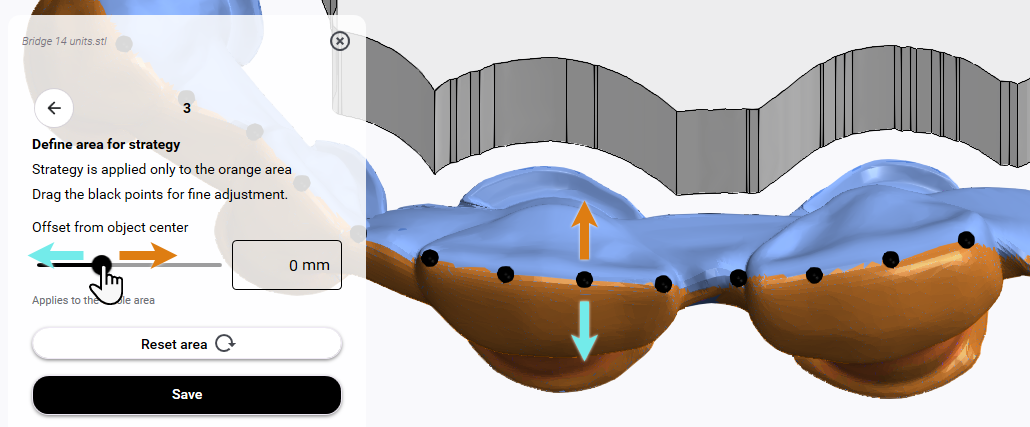
Specify the detail area in which dentalcam should apply the anterior tooth strategy. A greater detail area can reduce residual material in interdental areas, but also extends manufacturing duration.
-
Use the slider / the Offset from object center input field to adjust the size of the entire orange detail area in the Y-direction.
-
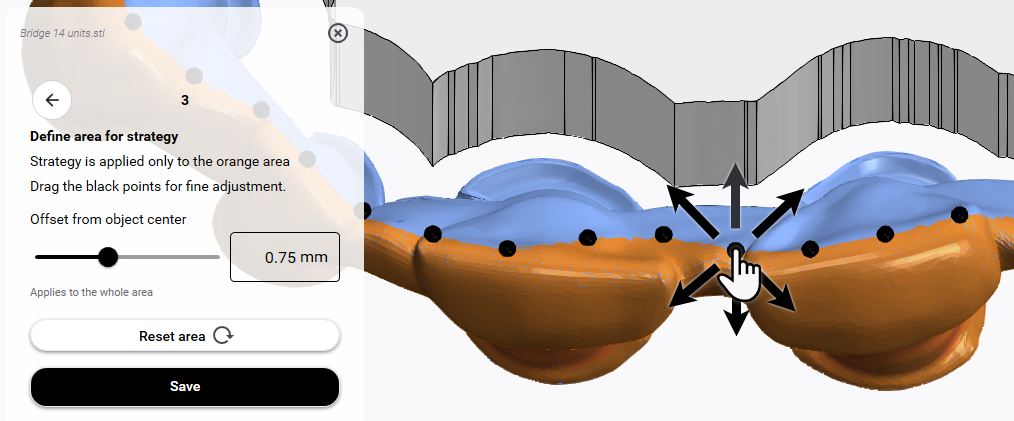
Move individual black dots to fine-tune the detail area.
-
-
Click the Save button to save.
Do not use
. -
Close the
Anterior tooth region editing function. -
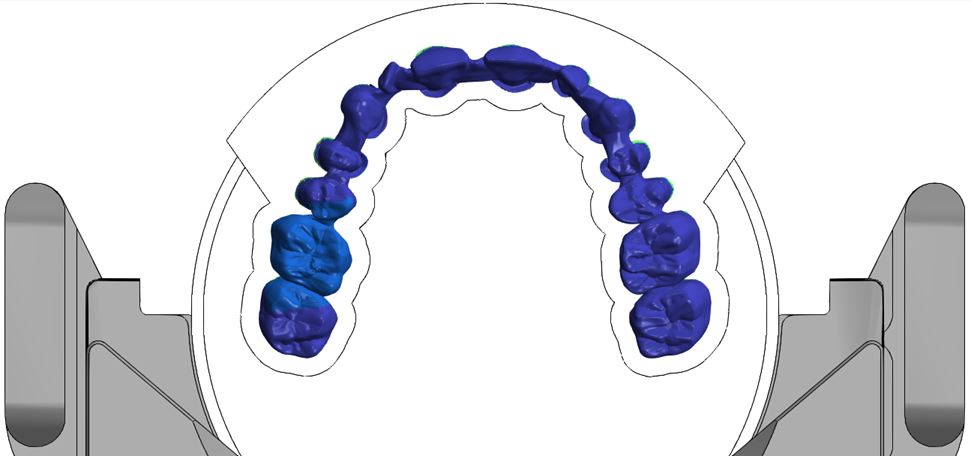
dentalcam displays the selected anterior tooth region in the blank display.
Deactivate the anterior tooth region
Requirement You have activated anterior tooth manufacturing for an object in the current blank.
-
Activate the top view with
. -
Select the desired object in the blank display.
-
Open the
Anterior tooth region editing function. -
Select
. -
Confirm with OK.


